Bird Drawing Reference Poses To Improve Your Sketches
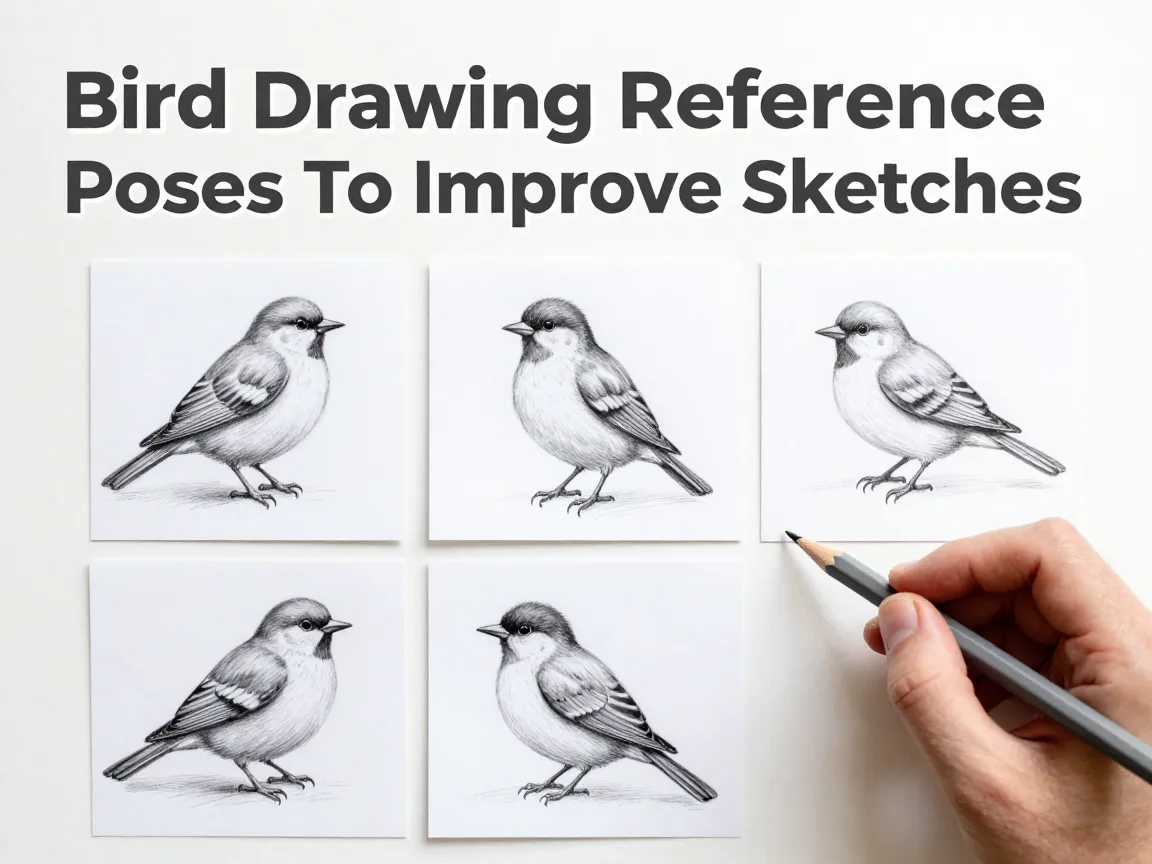
A sparrow holds still for less than two seconds before it shifts its weight, tilts its head, or launches into the air. That narrow window is exactly why so many bird sketches look stiff, flat, or anatomically confused. Artists are not working against a lack of skill. They are working against a lack of the right reference material. Mastering 6 bird drawing reference poses to improve your sketches gives any artist, from casual doodler to serious illustrator, a repeatable system for capturing believable posture, weight, and motion without needing a bird to pose on command.
Disclosure: This post contains affiliate links. As an Amazon Associate, we earn from qualifying purchases, and at no extra cost to you.
This guide breaks down the six reference situations that appear again and again in current drawing tutorials and field-sketching guides. Each pose teaches a different lesson about anatomy, balance, or gesture, and together they form a complete toolkit for drawing birds that look alive on the page rather than taxidermied.
Key Takeaways
- Six core poses, side profile, front view, three-quarter perch, tucked-wing rest, mid-flight, and behavior poses, cover nearly every drawing challenge a bird presents.
- Starting with a side-on perched pose simplifies proportions and is the recommended entry point for beginners.
- Front-view and three-quarter poses teach symmetry, chest depth, and foreshortening that profile views cannot show.
- Mid-flight and behavior poses are more advanced but reveal wing structure, feather texture, and emotional expression.
- Building an organized reference library of photos and videos, sorted by species and pose, makes every future sketch faster and more accurate.
Why Reference Poses Matter More Than Raw Talent
Drawing a convincing bird is less about rendering feathers and more about understanding posture. A bird’s skeleton, center of gravity, and muscle structure dictate how it sits, stands, and flies. Without a clear reference for these mechanics, even skilled artists tend to draw birds that look like they are floating, falling, or made of soft clay.
Recent tutorials from field-sketching educators and illustration guides consistently point to the same solution: practice a curated set of poses repeatedly until the underlying structure becomes second nature. This is the philosophy behind cycling through 6 bird drawing reference poses to improve your sketches rather than jumping randomly between species and angles. Repetition with variety builds muscle memory for proportion while still exposing the artist to the full range of situations a bird can occupy on the page.
Experienced instructors also emphasize starting with gesture before detail. A single line establishing the angle of the spine, from tail to head, should come before any shading or feather work. This gesture-first approach, often taught through quick “freeze-frame” memory exercises, pairs naturally with the six poses below because each one has a distinct gesture signature that becomes easier to recognize with practice.
The 6 Bird Drawing Reference Poses To Improve Your Sketches
The following six poses are drawn from the most frequently recommended reference situations across current bird-drawing tutorials, sketchbook-idea guides, and beginner courses. Each one targets a specific skill, so working through all six in order builds a well-rounded foundation.
1. Side-On Perched Pose
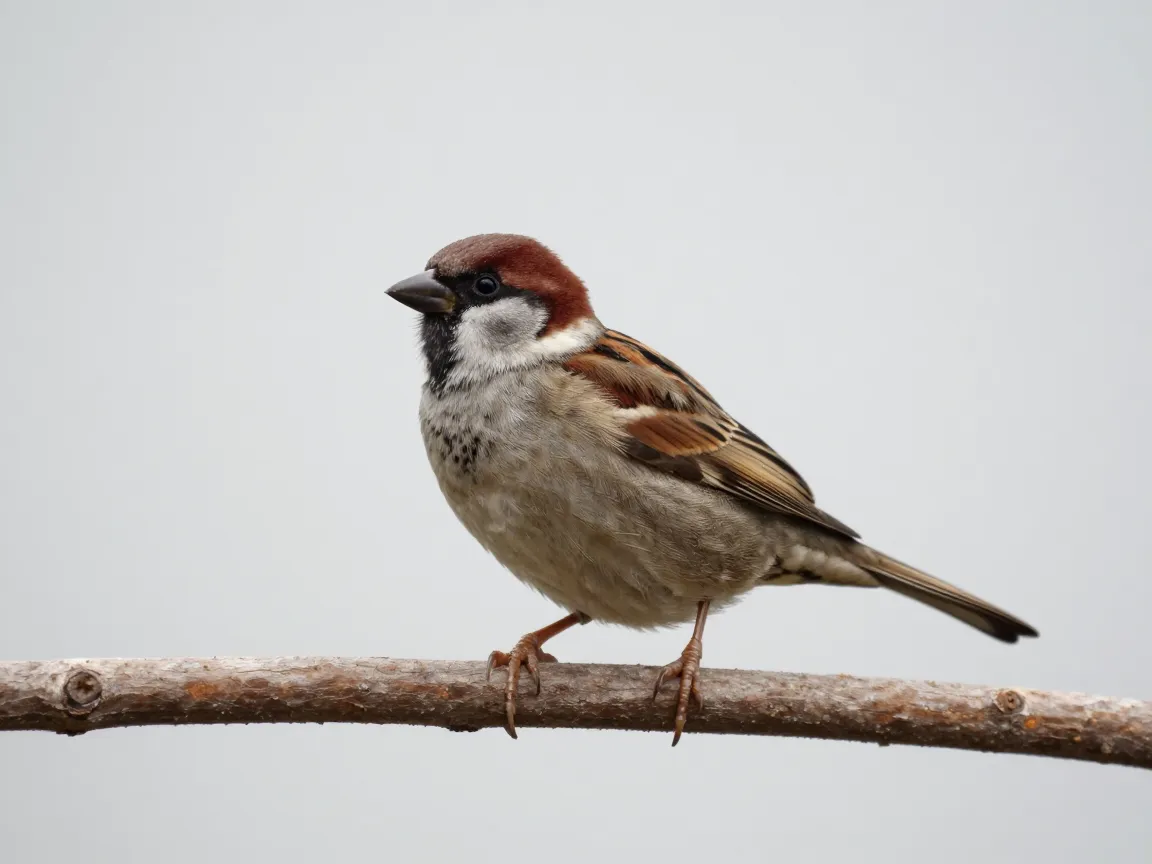
The side-on perched pose is the starting point most tutorials recommend first, and for good reason. A small songbird such as a sparrow, finch, or budgie photographed or observed from the side lays out every major body part in a single clean silhouette: head, beak, back, tail, and legs are all visible without any overlap confusion.
This simplicity makes the side profile ideal for learning proportion. Beginners can measure head size against body length, note where the legs attach relative to the belly, and study how the tail angles away from the perch. Because there is no foreshortening to account for, mistakes in proportion become obvious and easy to correct.
Practical tip: Choose a bird perched on a simple branch or fence rail rather than a cluttered background. This keeps the focus on the body shape itself rather than the environment. Sketch the same side profile three or four times using slightly different reference photos of the same species to internalize its typical resting shape.
2. Front-View Perched Pose
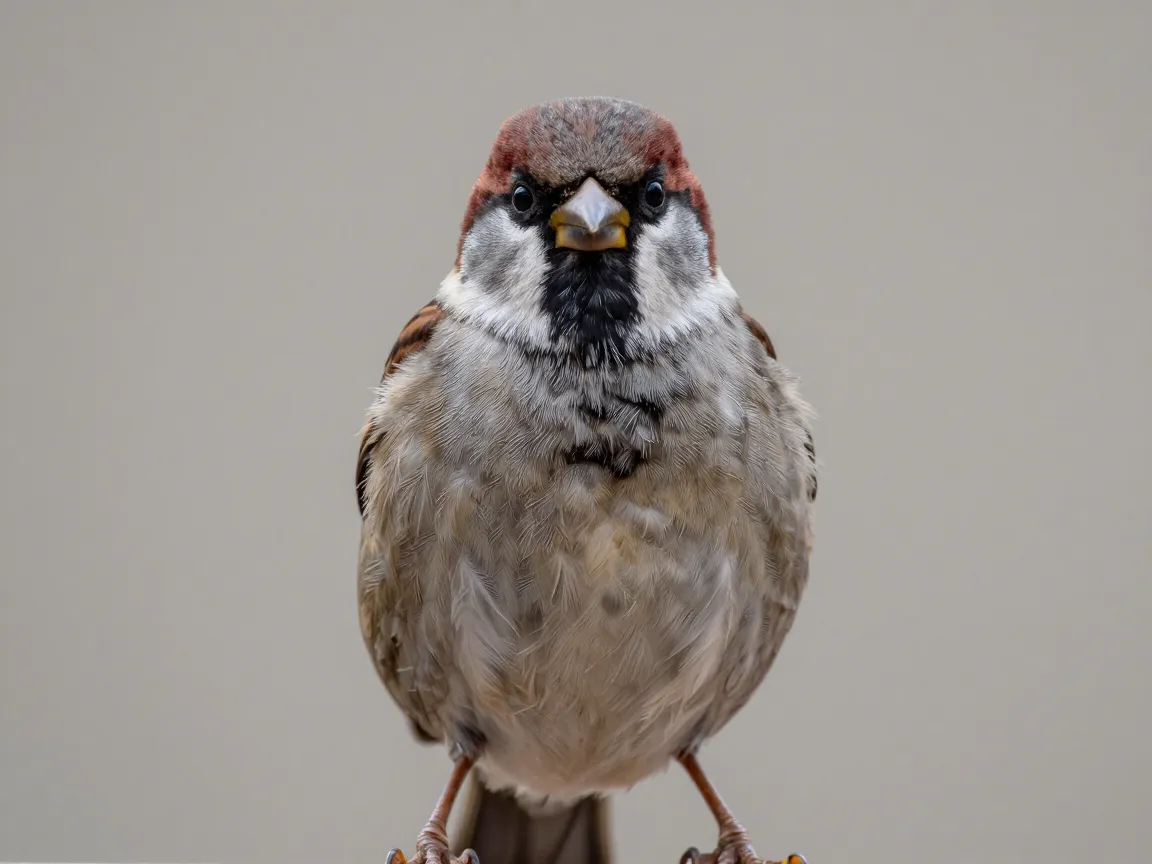
Once the side profile feels comfortable, the front-view perched pose introduces a new challenge: symmetry. A bird facing the viewer directly, often called a “perched sparrow, front view” in sketchbook-idea lists, forces the artist to balance both sides of the body evenly while also confronting a part of bird anatomy that side views hide entirely, the chest depth and keel projection.
The keel is the ridge of bone running down a bird’s breastbone, and from the front it creates a rounded, sometimes almost heart-shaped chest silhouette. Many beginner sketches look flat specifically because this three-dimensional chest volume gets ignored when artists only practice profile views.
A quick way to check symmetry while sketching the front view is to draw a faint vertical line down the center of the page before starting. The beak, eyes, and center of the chest should all align closely with this line, even as the wings and feet spread slightly outward.
3. Three-Quarter or Vigilant Perch Pose
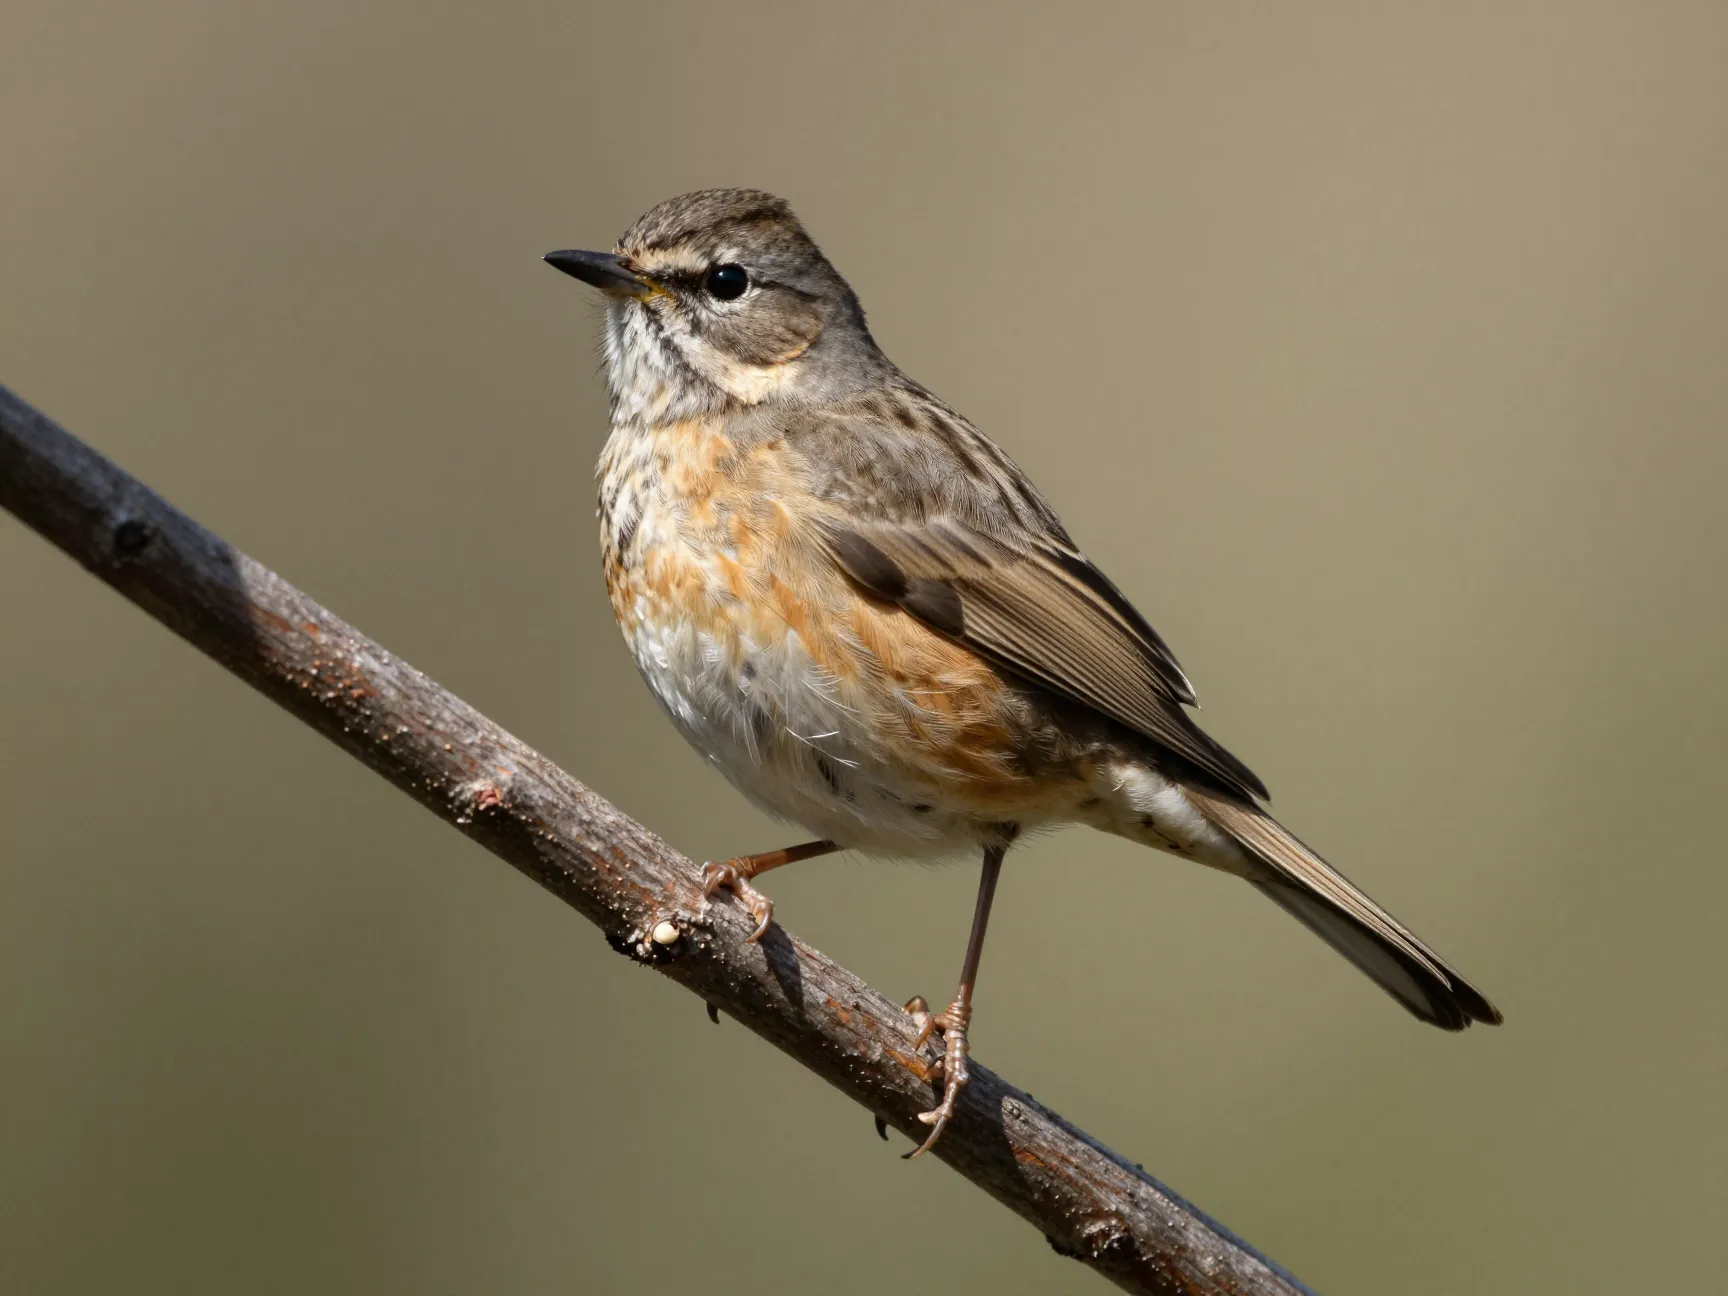
The three-quarter pose, sometimes called the vigilant perch because it often shows a bird alert and scanning its surroundings, sits between the side and front views. This angle introduces subtle foreshortening: one side of the body appears slightly compressed compared to the other, and the head is frequently turned to look past the shoulder.
Illustration guides that focus on building depth and realism treat this pose as a turning point in an artist’s development. It requires understanding how weight shifts when a bird stands on one leg with the other tucked up against its body, a common resting behavior that also tests balance in a drawing. Getting the three-quarter pose right means the bird looks like it occupies real space rather than sitting flat against the background.
To practice, find reference photos of birds on branches at an angle rather than straight-on, since branches rarely run perfectly parallel to the camera in nature. Pay attention to how the tail twists relative to the body and how the far wing appears shorter than the near wing due to perspective.
4. Sitting or Tucked-Wing Resting Pose
Wait, image placeholder must be used.
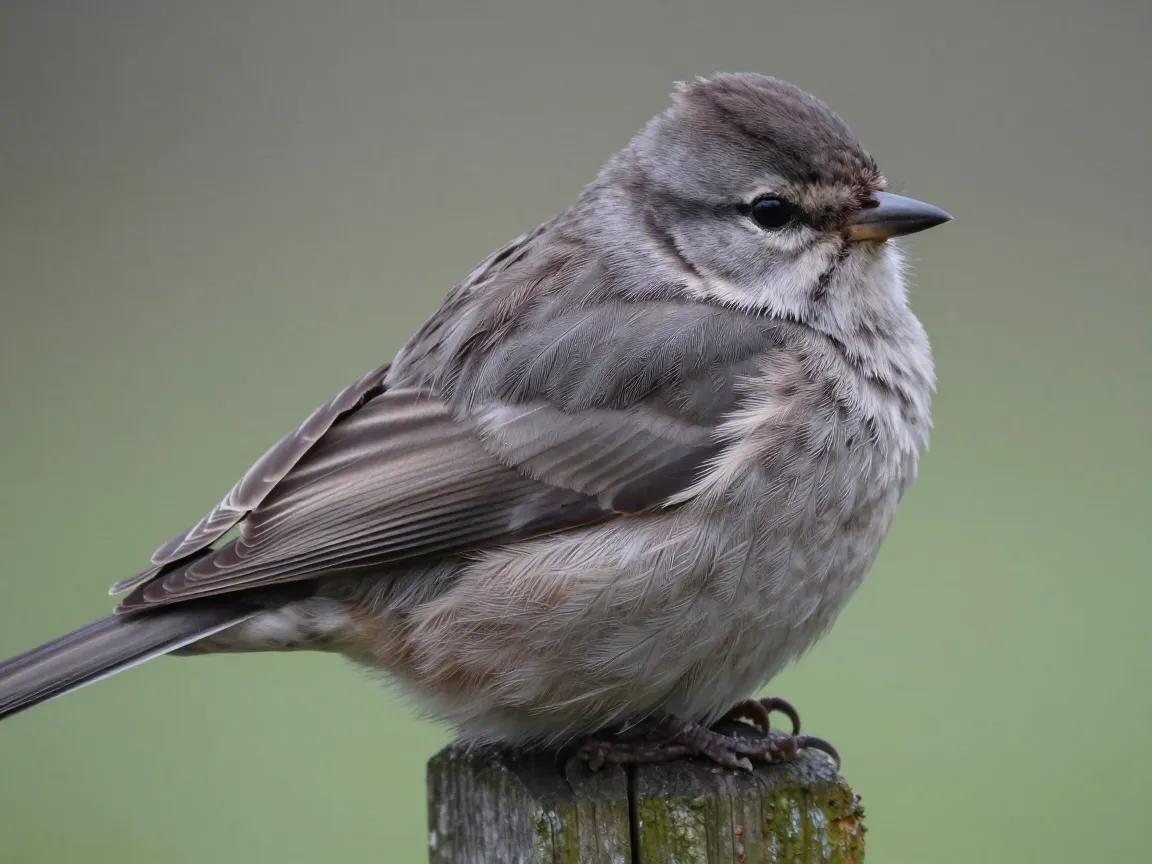
A relaxed, sitting bird with its wings folded tightly against its body teaches a completely different lesson than an active perch pose. This tucked-wing resting position, common in both small songbirds and resting waterfowl, shows how feather layers overlap smoothly when a bird is calm rather than alert or mid-motion.
Reference guides describe this pose as essential for understanding relaxed body shapes. The wings compress the overall silhouette into a rounder, softer form, and the legs often disappear almost entirely beneath the belly feathers. This is the pose many birds hold for long stretches of time, making it one of the easier situations to photograph or observe directly in a backyard or park setting.
Drawing this pose well requires resisting the urge to draw every individual feather. Instead, group feathers into larger overlapping sections, sometimes described as layered shapes similar to roof shingles, which creates a more believable texture than attempting to render each feather separately.
5. Mid-Flight Pose
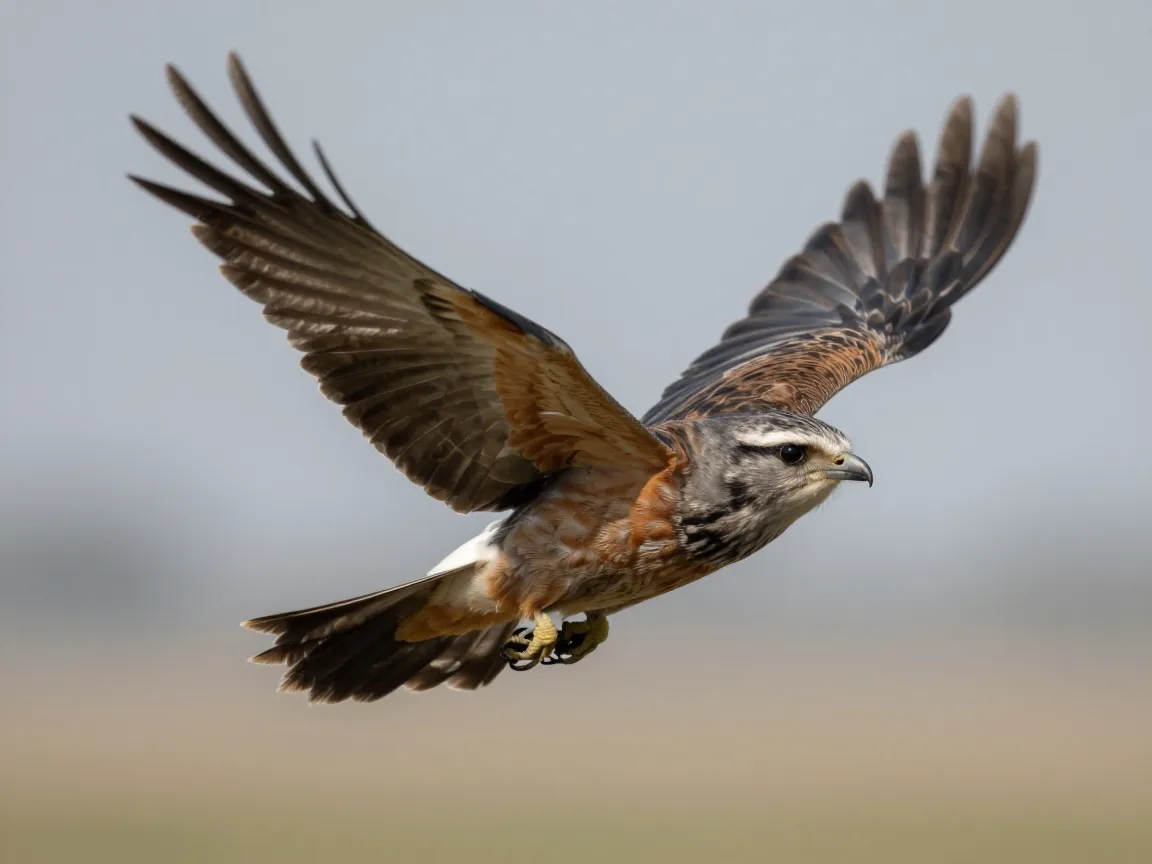
The mid-flight pose is widely considered the most advanced of the six, and most tutorials recommend saving it until the other poses feel confident. A bird in flight displays full wing extension, varying wing-beat positions, and a body that often twists or curves in response to air currents and direction changes.
This pose is valuable precisely because it is difficult. It forces an artist to understand the full skeletal structure of the wing, including how primary and secondary feathers fan out differently depending on whether the bird is gliding, flapping upward, or flapping downward. Photographic references are essential here since no human eye can freeze a wingbeat in real time.
Building a small collection of mid-flight photos covering different wing positions, wings fully raised, wings level, wings fully lowered, gives a far more complete picture than relying on a single image. Free high-resolution flight photo galleries and nature photography archives are commonly recommended sources for this kind of varied reference material, since capturing these moments personally requires fast shutter speeds and significant patience.
6. Behavior Poses: Preening, Pecking, and Display
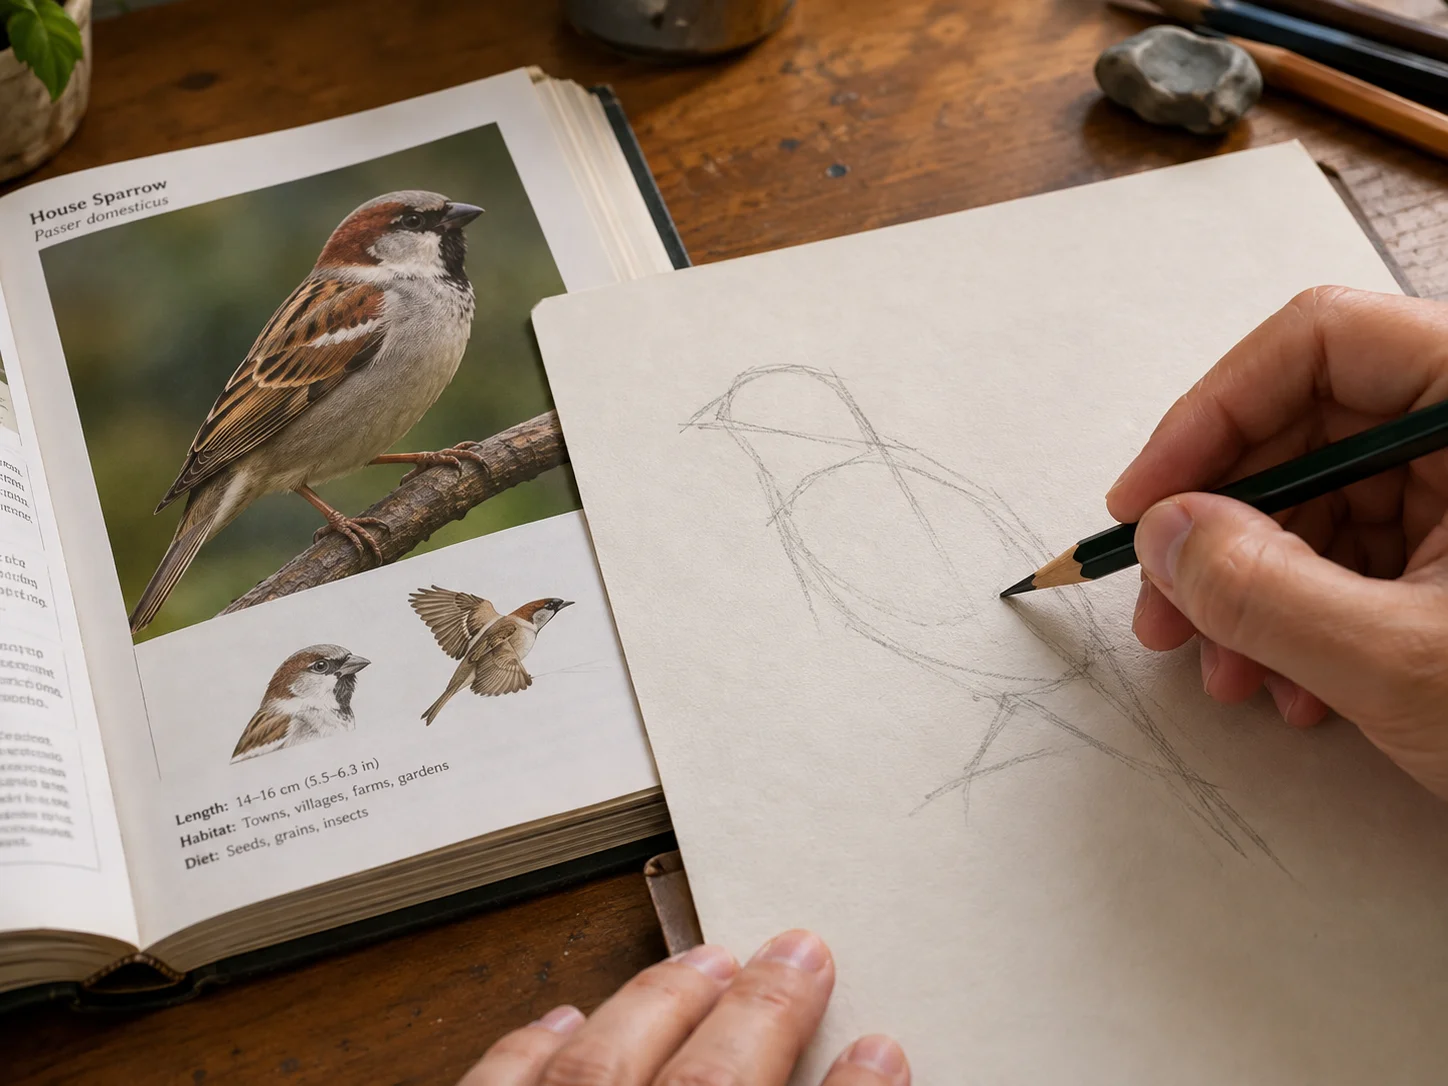
The sixth reference situation covers behavior-based poses, including preening, pecking at food or the ground, and aggressive or territorial display. These poses are less about static anatomy and more about gesture, storytelling, and emotional expression.
A preening bird twists its neck at extreme angles to reach feathers along its back or wings, revealing just how flexible a bird’s neck actually is compared to its relatively rigid body. A pecking bird lowers its head and often tilts its tail upward for balance, creating a dynamic diagonal line through the whole figure. An aggressive display pose, such as a puffed chest or raised feathers, shows how birds use their plumage to appear larger or more intimidating.
Illustration idea lists frequently separate these into distinct categories, sometimes labeled with names like “elegant preening” or “aggressive display,” because each one highlights a different kind of movement and a different emotional tone. Practicing all three within the behavior category rounds out an artist’s ability to suggest personality and narrative in a single frozen pose, which is often what separates a technically correct bird sketch from one that feels genuinely alive.
How To Build a Reference Library for These Six Poses
Having access to good reference material is just as important as knowing which poses to study. Current guidance from wildlife photographers and drawing instructors points to a few consistent best practices for assembling a usable library.
Start by capturing or sourcing multiple photos per pose rather than relying on a single image. A telephoto lens of at least 300 millimeters paired with a fast shutter speed, generally 1/500 of a second or quicker, captures birds without disturbing their natural behavior and freezes motion sharply enough to study wing and leg positions clearly. For artists who do not have access to this kind of equipment, free wildlife photography archives and flight galleries offer a reliable substitute.
Once photos are collected, organization becomes the key to actually using them. A simple folder structure sorted first by species and then by pose type, side profile, front view, three-quarter, resting, flight, and behavior, makes it far faster to find the right reference when sitting down to sketch. Some artists also sort a secondary layer by lighting condition, since harsh midday light and soft overcast light reveal feather texture very differently.
The table below summarizes a practical system for organizing reference material around the six poses.
| Pose Category | Best Capture Method | Primary Skill Learned |
|---|---|---|
| Side-on perched | Direct photo, side angle | Basic proportion and silhouette |
| Front-view perched | Direct photo, head-on angle | Symmetry and chest volume |
| Three-quarter perch | Angled branch photo | Foreshortening and weight balance |
| Tucked-wing resting | Candid photo, calm bird | Relaxed shapes and feather layering |
| Mid-flight | Telephoto, fast shutter | Wing structure and motion |
| Behavior poses | Video or burst photos | Gesture and emotional expression |
Video footage deserves particular attention. Because birds move quickly, a short video clip can be paused frame by frame to find a mid-action moment that a single photo might miss entirely, such as the exact instant a wing reaches full extension during a wingbeat. Several current drawing resources suggest that pulling individual frames from slow-motion or high-frame-rate video is becoming one of the most efficient ways to study flight and behavior poses in detail.
Anatomy Basics That Support Every Pose
No reference photo, no matter how sharp or well-lit, replaces a basic understanding of bird anatomy. Several widely used step-by-step drawing guides recommend building bird figures from simple overlapping shapes before refining any contour lines. A common approach treats the body as two overlapping egg shapes, one larger for the torso and one smaller for the head, connected by a short neck.
Three anatomical points make the biggest difference when adapting a reference photo into a confident sketch.
Wing structure matters because wings fold in a very specific pattern at rest, with the primary feathers crossing near the tail tip. Understanding this folding pattern prevents the common mistake of drawing a resting bird’s wings as a flat, featureless patch.
Leg anatomy matters because bird legs bend at a joint that is often mistaken for a backward knee. In reality, that visible joint is closer to an ankle, and the true knee sits hidden higher up against the body, tucked beneath feathers. Knowing this helps explain why a perched bird’s visible leg bend looks the way it does in nearly every reference photo.
Center of gravity matters because it explains why birds lean, crouch, or spread their tail for balance in certain poses. A bird about to take flight often lowers its body and extends its neck forward, shifting its center of gravity ahead of its feet in preparation for the push upward. Recognizing this shift helps an artist anticipate motion even from a single still photo.
A Simple Practice Routine Using All Six Poses
Several beginner-focused guides suggest a focused practice method: pick one species and sketch it repeatedly until it has been drawn in essentially every pose it commonly takes. This approach works especially well when paired with the six poses outlined above, since it turns a broad concept into a manageable checklist.
A practical weekly routine might look like this.
- Spend one session on the side-on perched pose using three different reference photos of the same species.
- Spend one session on the front-view perched pose, focusing on symmetry and chest shape.
- Spend one session on the three-quarter perch, paying close attention to the tucked leg and turned head.
- Spend one session on the tucked-wing resting pose, practicing simplified feather grouping.
- Spend one session on mid-flight studies using either photo references or paused video frames.
- Spend one final session combining behavior poses, sketching a preening, pecking, and display moment from the same species if possible.
Working through this sequence with a single species before moving to a new one builds a much deeper understanding than jumping randomly between unrelated birds. By the end of six sessions, the underlying structure of that species, and often of similar birds in the same family, becomes far more intuitive to draw from memory.
Common Mistakes To Avoid When Using Reference Poses
Even with strong reference material, a few recurring mistakes show up across beginner sketches.
Copying a single photo too literally without understanding the anatomy behind it often produces a technically accurate but lifeless drawing. Cross-referencing two or three photos of the same pose helps an artist understand the underlying structure rather than just tracing surface details.
Skipping the gesture line is another frequent issue. Jumping straight into outlining feathers or beak details before establishing the overall angle of the body, as recommended in gesture-first tutorials, tends to produce stiff, static results even when the pose reference itself is dynamic.
Ignoring lighting direction can flatten a sketch. A reference photo’s shadows reveal the three-dimensional form of the chest, wings, and head, and skipping this information in favor of flat outlines removes much of the realism a good pose reference is meant to provide.
Finally, relying only on easy poses and avoiding the harder ones, particularly mid-flight and behavior poses, limits growth. These two categories are harder precisely because they teach the most about motion and expression, making them worth the extra effort even when progress feels slower.
Frequently Asked Questions
Which of the six poses should a beginner start with?
The side-on perched pose is the recommended starting point because it shows every major body part without overlap or foreshortening, making proportion easier to judge accurately.
Is mid-flight too difficult for a new artist to attempt?
Mid-flight poses are more advanced, but they are not off-limits for beginners. Using paused video frames or multiple photo references of the same wing position makes this pose far more approachable than attempting it from memory alone.
How many reference photos are needed per pose?
Most current guides suggest at least two or three photos per pose and species. A single photo can mislead an artist about proportion or lighting, while multiple images reveal the consistent underlying structure.
Does the species of bird matter when practicing these six poses?
Smaller songbirds such as sparrows, finches, and budgies are commonly recommended for beginners because their proportions are simpler and reference material is widely available. The same six-pose structure applies to any species once the basics feel comfortable.
What equipment helps capture original reference photos?
A telephoto lens of roughly 300 millimeters or more, combined with a shutter speed of 1/500 of a second or faster, captures birds clearly without disturbing their natural behavior, which is especially useful for flight and behavior poses.
Conclusion
Bird sketches improve dramatically once an artist stops guessing at posture and starts working from a structured set of references. The six poses covered here, side-on perched, front-view perched, three-quarter perch, tucked-wing rest, mid-flight, and behavior poses, cover nearly every situation a bird presents on paper. Practicing 6 bird drawing reference poses to improve your sketches in sequence, with a single species before moving on, builds both proportion skills and a genuine feel for how birds move and behave.
The next step is practical: pick one accessible bird species, gather or photograph two or three references for each of the six poses, and work through the weekly practice routine outlined above. Keep the reference library organized by species and pose so future sketching sessions start faster. Within a few weeks of consistent practice, the stiffness that often marks early bird drawings tends to give way to sketches that capture real weight, balance, and personality on the page.