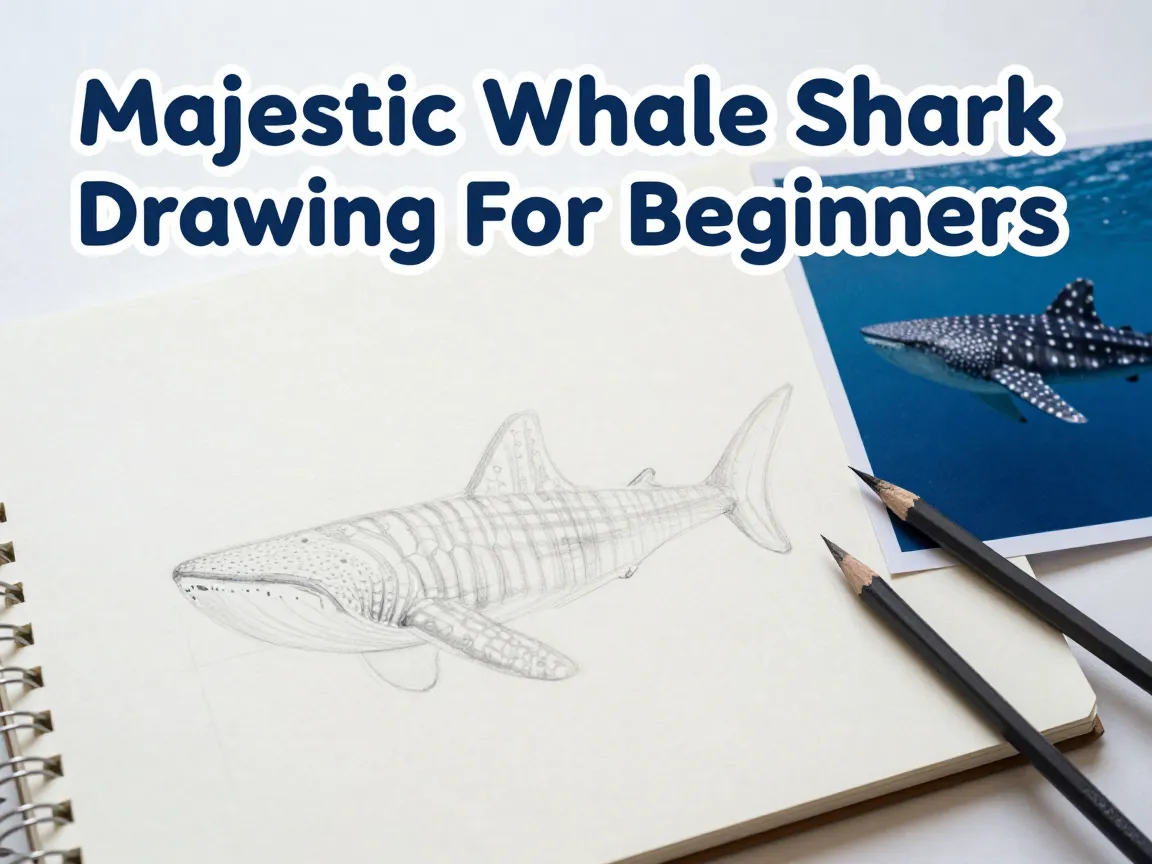
Steps To Create A Majestic Whale Shark Drawing For Beginners
A whale shark can grow longer than a city bus, yet most beginner sketches of one end up looking like a flat, lifeless cartoon fish. The reason is almost never a lack of talent. It is a missing structure. Artists who follow a clear, repeatable sequence consistently produce more convincing results than those who freehand the whole animal at once. That is exactly what this guide delivers: a focused walkthrough of 6 Steps To Create A Majestic Whale Shark Drawing For Beginners that turns a blank page into a confident, ocean-ready illustration.
Disclosure: This post contains affiliate links. As an Amazon Associate, we earn from qualifying purchases, and at no extra cost to you.
Whether the goal is a classroom art project, a marine biology poster, or simply a new skill to practice on a rainy afternoon, this method breaks the process into manageable stages. Each step builds on the last, so there is no guesswork about what to draw next or why a line belongs where it does.
Key Takeaways
- Before diving into the full walkthrough, here is a quick summary of what matters most when learning to draw a whale shark.
- Start every whale shark drawing with large, simple shapes for the head, body, and fins before adding any detail.
- Follow the 6 Steps To Create A Majestic Whale Shark Drawing For Beginners in order: head and back, tail and underside, major fins, body contours, gills and facial features, then spots and shading.
- Accurate proportions matter more than fine detail. A broad, flattened head and a tall dorsal fin instantly make a shark look like a whale shark rather than a generic one.
- The signature “majestic” look comes from surface pattern work: scattered white spots on a dark blue-gray back, paired with a lighter, almost white underbelly.
- Light pencil guidelines, patience with erasing, and reference photos of real whale sharks dramatically improve the final result for beginners at any skill level.
What You Need Before Starting Your Whale Shark Drawing
Good materials do not make a good artist, but the right basic tools remove unnecessary friction. Beginners attempting the 6 Steps To Create A Majestic Whale Shark Drawing For Beginners do not need an expensive kit. A few inexpensive items are enough to produce a polished result.
A simple supply list includes:
- A sketchpad or heavy drawing paper that can handle light erasing without tearing.
- A set of graphite pencils, ideally one soft (like a 2B) for shading and one harder (like an HB) for clean outlines.
- A kneaded or vinyl eraser for lifting guidelines without smudging the page.
- A fine-tip black pen or marker for inking the final lines once the sketch is confirmed.
- Colored pencils, markers, or watercolor paints in dark blue, gray, and white for the finishing stage.
- A reference photo of a real whale shark, since even experienced illustrators lean on reference images to keep proportions accurate.
None of these items need to be premium brands. A standard pencil and printer paper will work for practice rounds. The reference photo matters more than any tool on this list, because whale sharks have a distinctive body shape that is easy to get wrong without something to compare against.
The 6 Steps To Create A Majestic Whale Shark Drawing For Beginners
This is the core sequence. Leading beginner art tutorials, whether text-based step guides or video walkthroughs, converge on the same general order because it mirrors how the whale shark’s body is actually built: a broad head leading into a long tapering body, large fins positioned at specific points, and a pattern of spots layered on top at the very end. Working through these 6 Steps To Create A Majestic Whale Shark Drawing For Beginners in sequence prevents the common beginner mistake of adding detail too early and then struggling to fix proportions later.
1. Outline the Head and Back
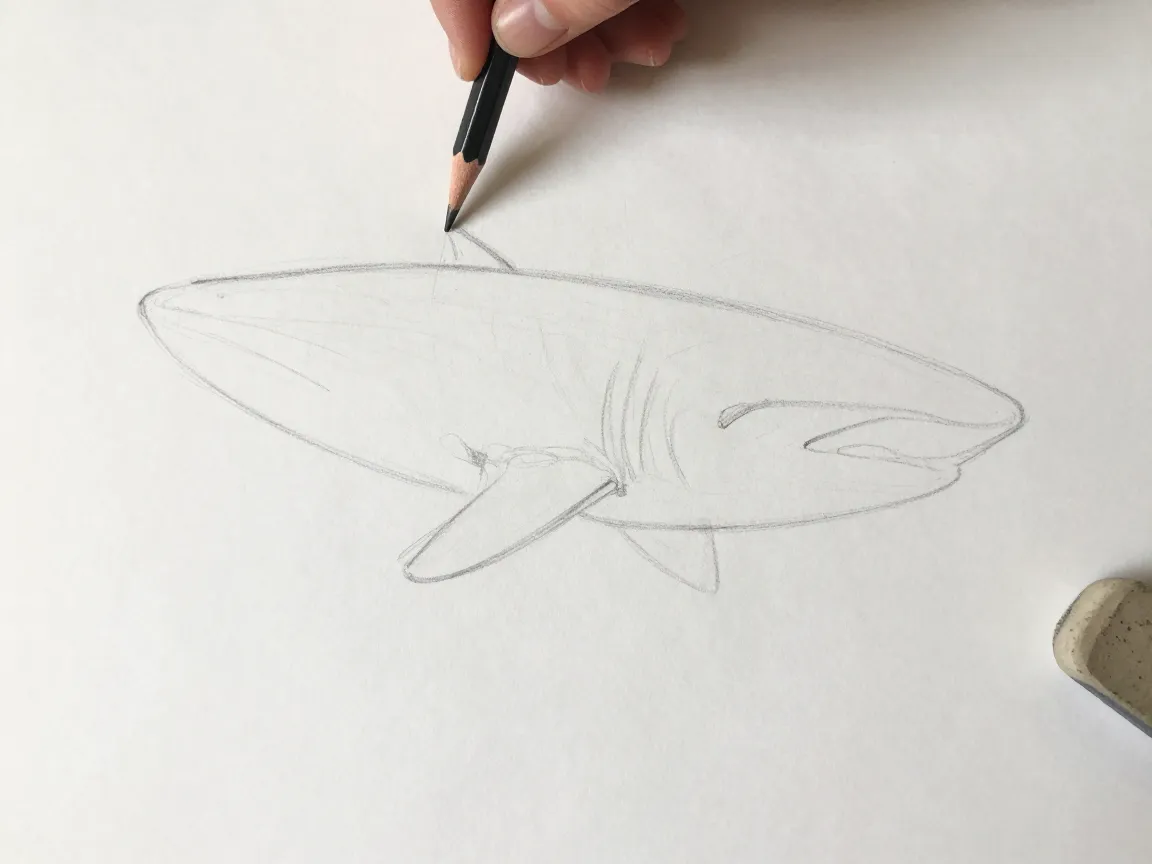
Begin with a long, gently curving line that represents the top of the whale shark’s back, starting from a wide, rounded front edge. Unlike most sharks, a whale shark has a broad, flattened head rather than a pointed snout. Sketch this first shape lightly, using loose pencil strokes rather than a single committed line. At this stage, the goal is only to establish where the head ends and the back begins, not to capture any fine detail.
Keep the line thin and faint. Everything drawn in this stage is a guideline, and guidelines should be easy to erase or adjust once the next steps reveal whether the proportions look right. A common error here is rushing this outline into something too narrow at the front, which produces a shark-like shape rather than the distinctly broader whale shark profile.
2. Shape the Tail and Underside
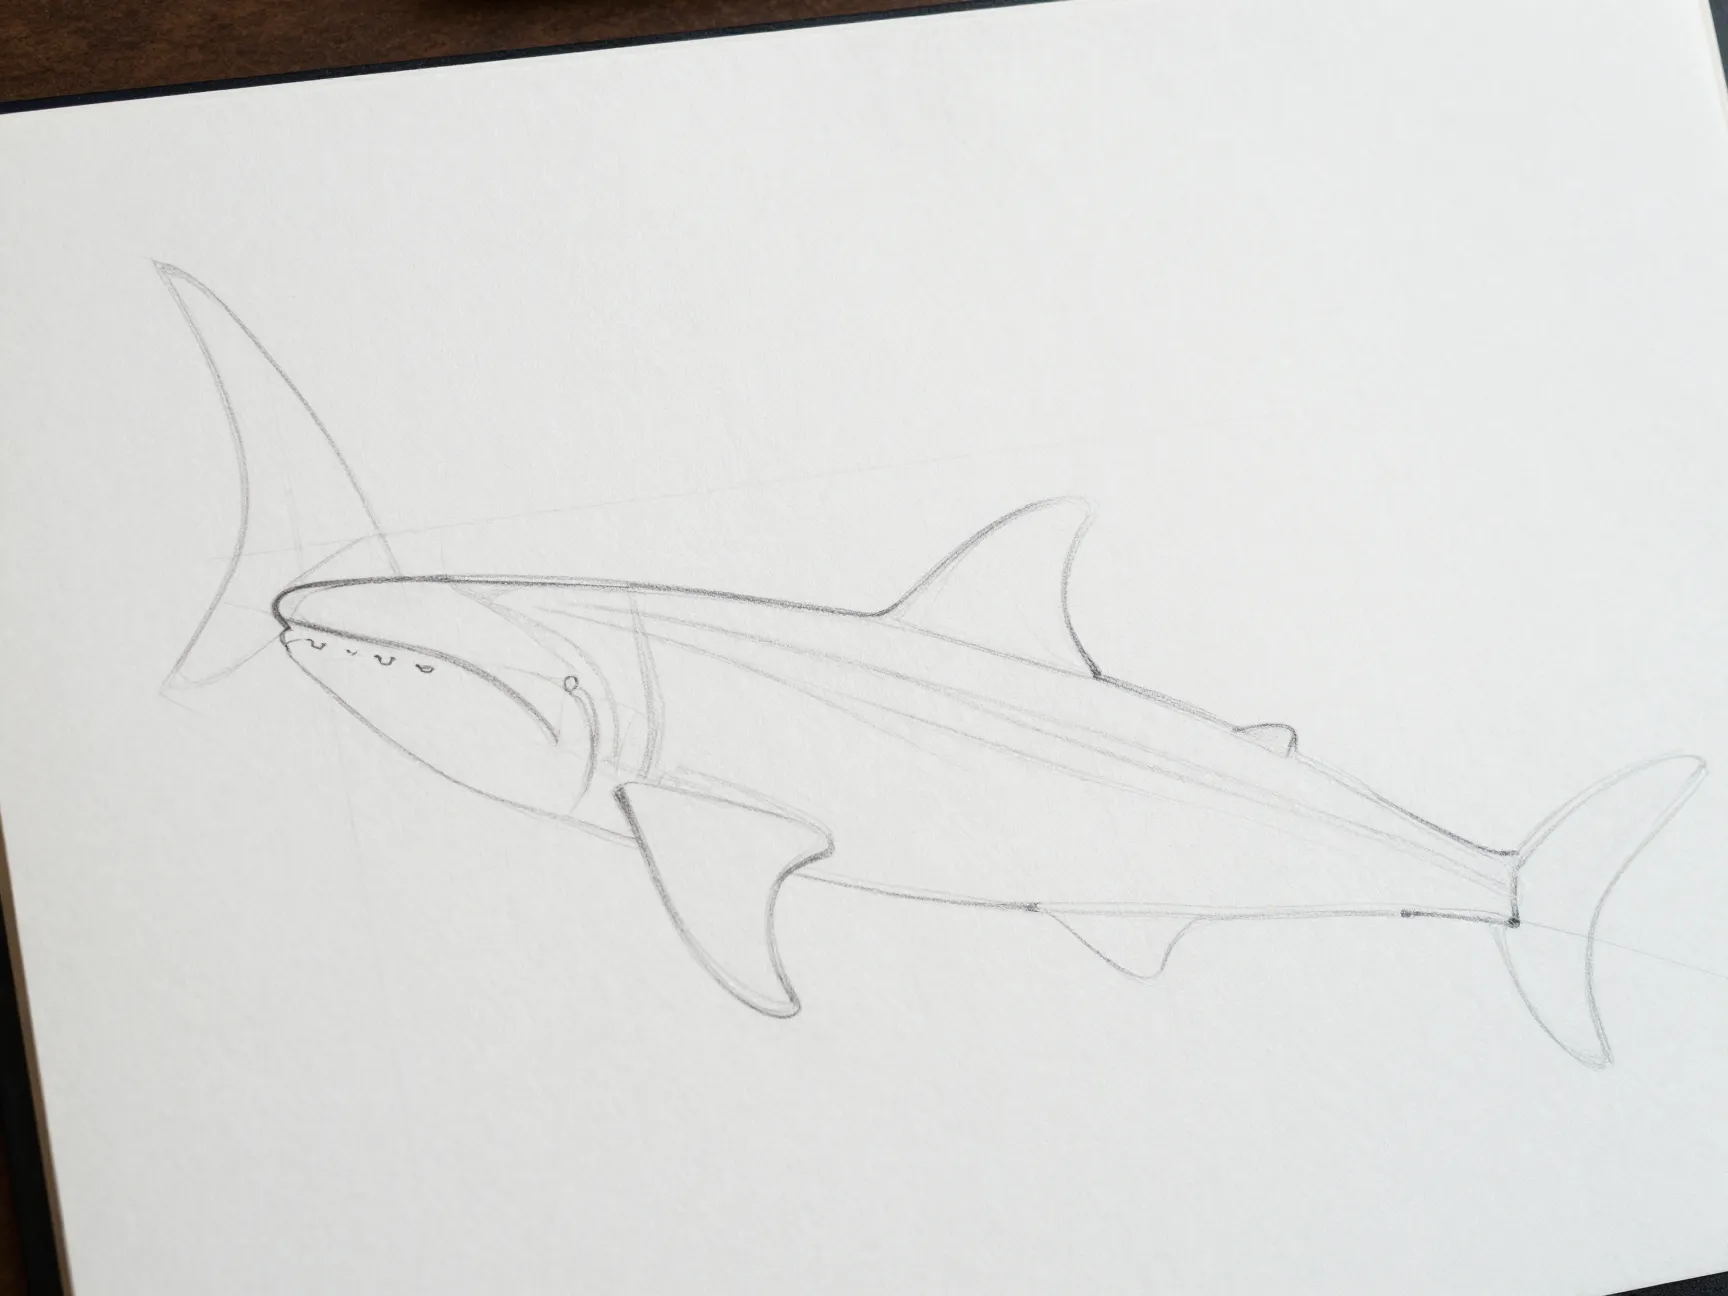
Next, extend the body outline backward into a long, tapering tail. Whale shark tails are large and crescent-shaped, with a noticeably longer top lobe than bottom lobe. Sketch this asymmetry deliberately, since a perfectly symmetrical tail will look more like a dolphin or a generic fish than a whale shark.
Below the back line, draw the underside of the body. This line should run roughly parallel to the back but curve inward slightly near the head and tail, giving the body a rounded, torpedo-like cross-section. At this point, the basic silhouette of the whale shark should already be recognizable, even without any fins or facial features.
A quick way to check proportions is to compare the length of the head-to-mid-body section against the mid-body-to-tail section. On a real whale shark, the body tapers gradually rather than narrowing sharply, so avoid any abrupt pinch points along the outline.
3. Draw the Major Fins
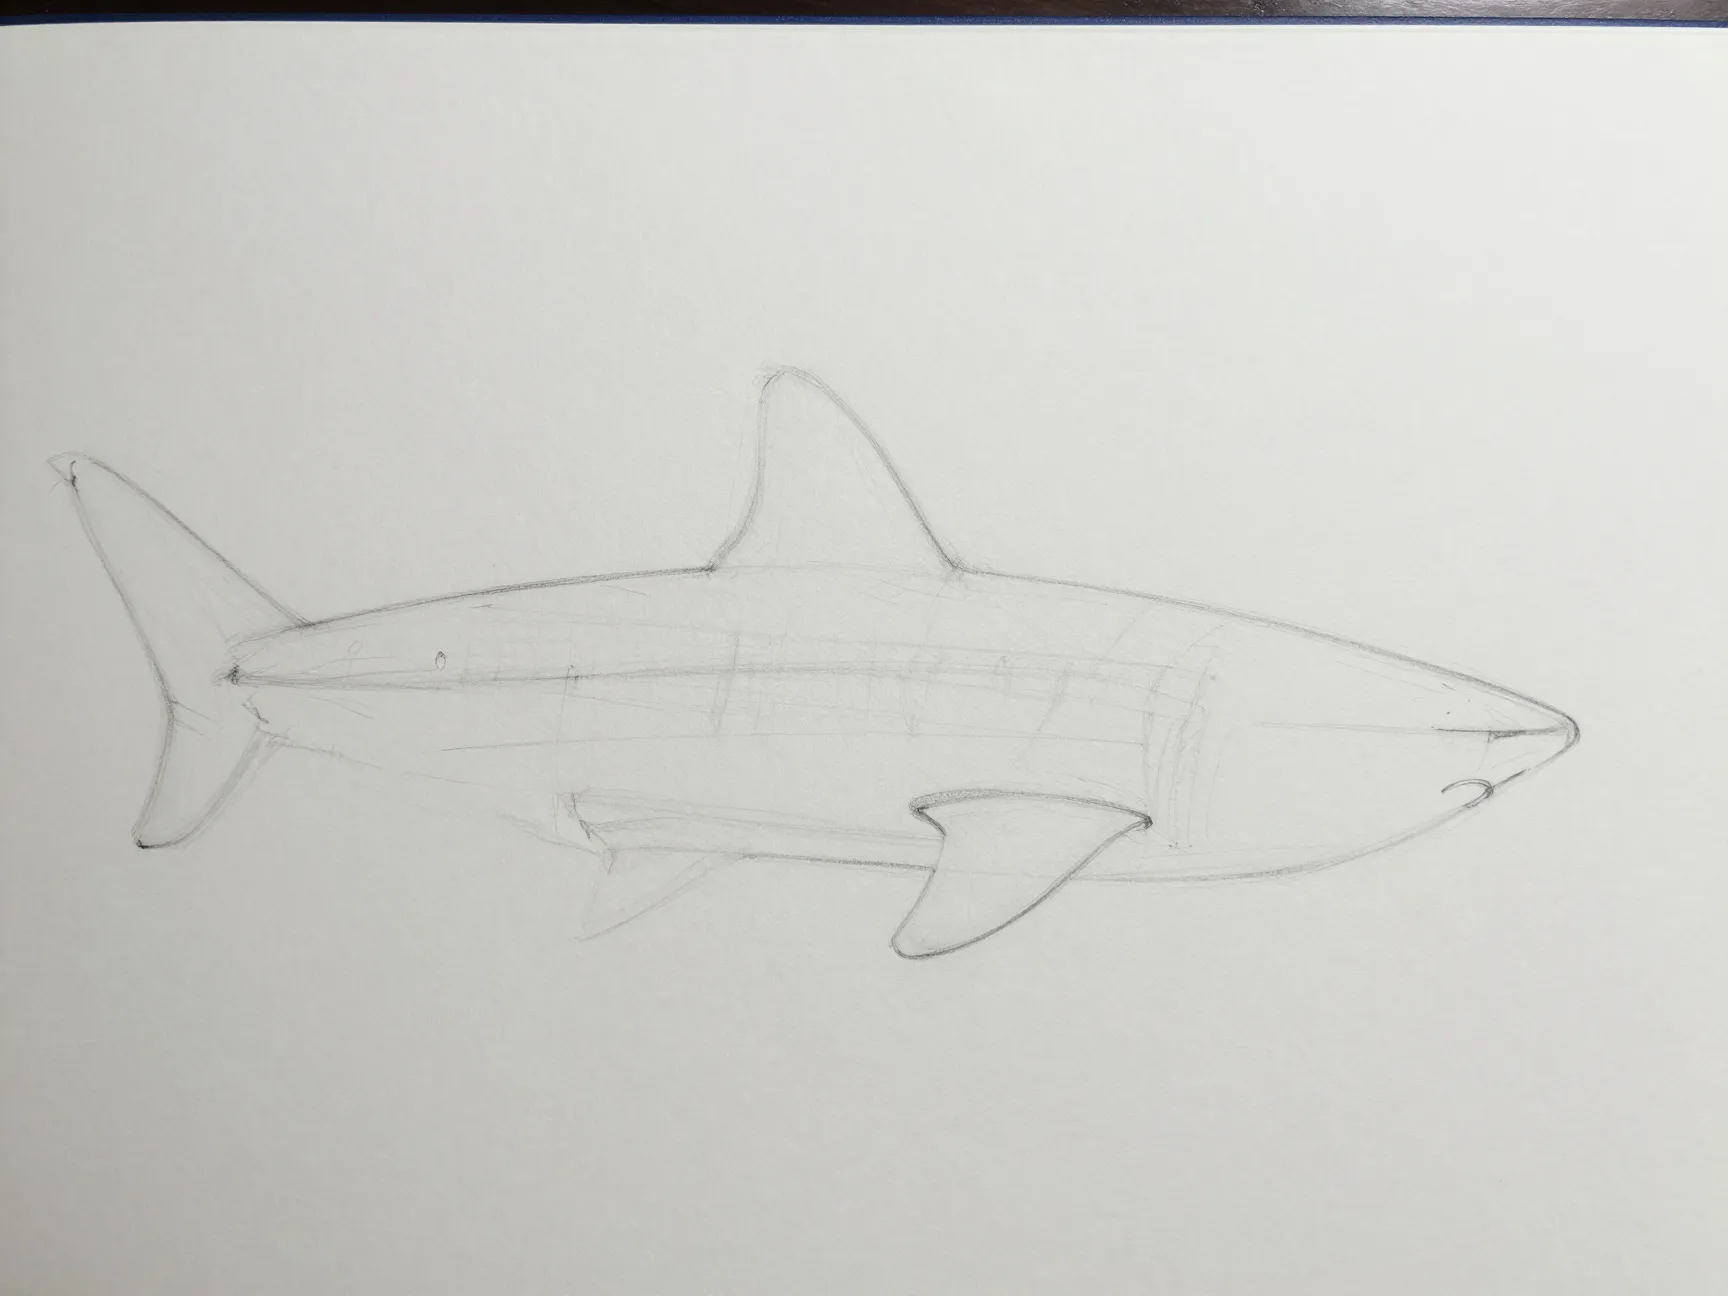
With the body outline in place, add the two most visually important fins: the large dorsal fin on top and the broad pectoral fins on the sides. The dorsal fin should be tall and roughly triangular, positioned around the midpoint of the back. Pectoral fins extend outward and slightly backward from just behind the head, and they are notably large and wing-like on a whale shark compared to smaller shark species.
Sketch these fins as simple rounded triangles at first. Precision comes later; the priority right now is placement and relative size. A fin drawn too small will make the whole animal look underpowered and flat, while a fin that is too far forward or backward can throw off the entire silhouette’s balance.
Pull quote: “A whale shark’s majesty comes from scale and proportion, not from complicated linework. Get the big shapes right, and the detail almost draws itself.”
4. Refine the Body Contours
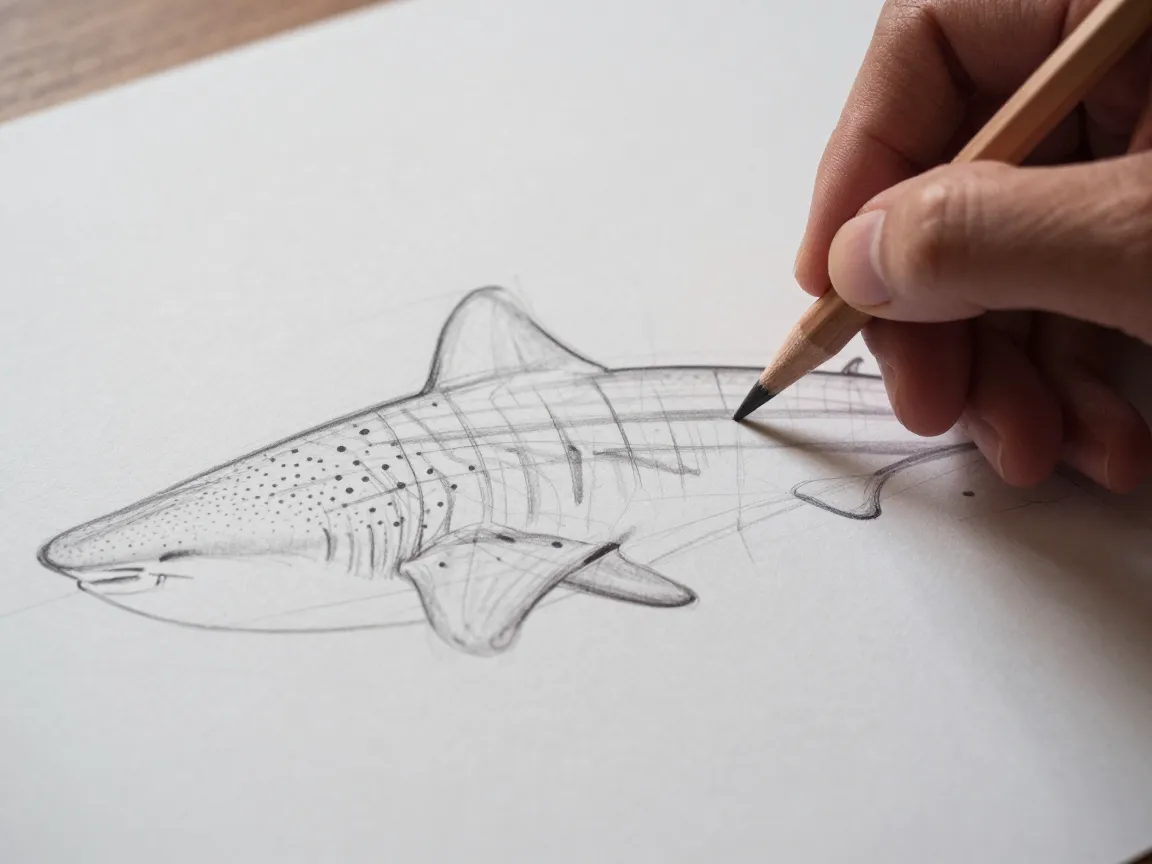
This step is where the rough outline becomes a confident, finished shape. Go back over the guidelines from steps one through three and smooth out any awkward bumps or inconsistent curves. The back line should flow in one continuous arc, and the underside should mirror that same smoothness.
Pay close attention to the transition points where the head meets the body and where the body meets the tail. These areas often look choppy in early sketches because they were drawn as separate guideline segments. Blending them into single, fluid curves is what separates a stiff, amateur outline from one that reads as a living, swimming animal. Use a slightly darker pencil line for the contours that are confirmed as final, while keeping any still-uncertain sections light enough to erase.
5. Add Gills and Facial Features
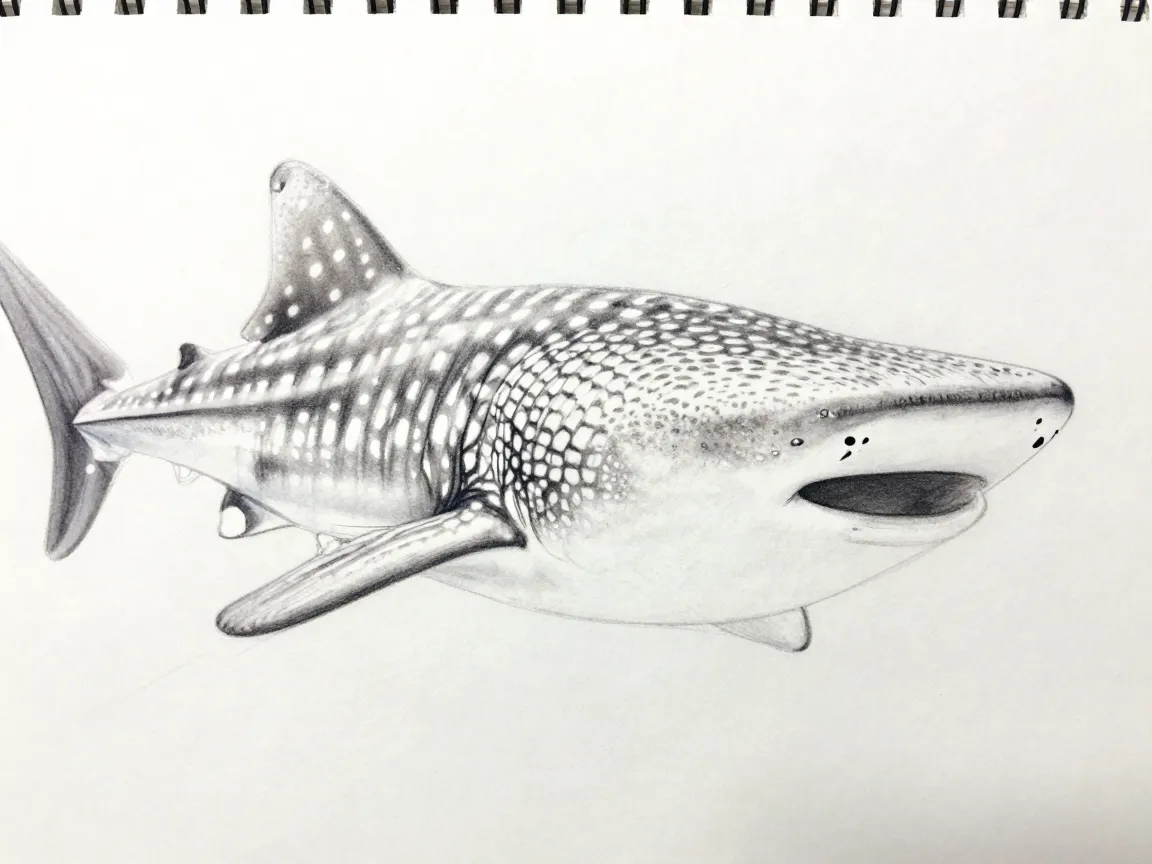
Whale sharks have small eyes set far forward on an enormous head, along with a wide, straight mouth and a row of gill slits along the sides just behind the head. Add these details now, after the body structure is locked in. Draw the eyes as small ovals or circles near the front edge of the head, proportionally tiny compared to the overall head size, since this is one of the whale shark’s most distinctive and often misunderstood features.
The mouth sits near the very front of the head and is wide and flat rather than curved into rows of visible sharp teeth, which immediately distinguishes it from the menacing look often associated with sharks in general. Gill slits are drawn as a series of five curved lines positioned just behind the head on each side.
Getting these features correctly placed is what pushes the drawing from “generic shark” to “unmistakably a whale shark.” Reference photos are especially useful at this stage, since even small shifts in eye placement can change the character of the entire face.
6. Finish With Spots, Stripes, and Shading
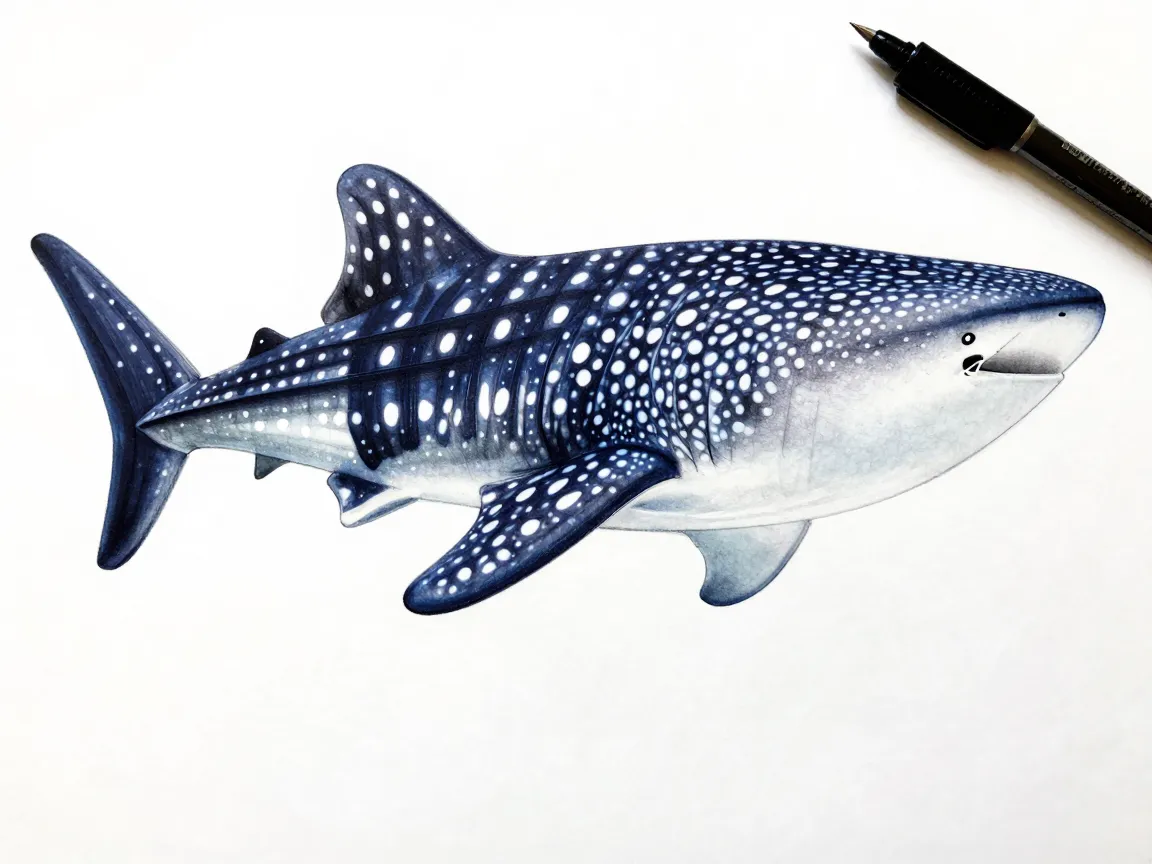
The final step in the 6 Steps To Create A Majestic Whale Shark Drawing For Beginners is also the one most responsible for the “majestic” visual payoff: the pattern. Whale sharks are famous for a checkerboard-like arrangement of pale spots and faint vertical stripes across a dark blue-gray back, fading into a much lighter, almost white belly.
Start by shading the top of the body with a dark blue, gray, or charcoal pencil, leaving the underside noticeably lighter. Then layer small, irregular white spots across the shaded back and upper fins using a white colored pencil, a thin paint layer, or simply by leaving small unshaded circles in the pencil work. Avoid making the spots too uniform in size or spacing, since real whale shark patterns are irregular and scattered rather than arranged in neat rows.
A simple reference table can help keep the color choices consistent:
| Body Area | Typical Color | Purpose |
|---|---|---|
| Top of head and back | Dark blue or gray | Establishes the whale shark’s natural camouflage from above |
| Sides and fins | Medium gray-blue | Transitions smoothly between dark top and light belly |
| Underbelly | White or very light gray | Mimics real countershading seen in whale sharks |
| Spots and faint stripes | Bright white | Creates the iconic pattern that makes the species instantly recognizable |
Once the shading and spots are complete, go over the final confirmed outline with a fine-tip pen if an inked version is desired, then erase any remaining pencil guidelines. At this point, the drawing should show a clear, anatomically believable whale shark with a sense of scale and movement.
Tips to Make Your Whale Shark Drawing Look More Majestic
Completing the six core steps produces a solid, accurate whale shark drawing. A few extra techniques can elevate it further without adding much complexity.
Add a faint sense of water around the shark, such as light curved lines or soft shading near the bottom of the page, to suggest it is swimming rather than floating in empty space.
Vary spot size slightly larger near the head and smaller near the tail, which mimics how real whale shark patterns naturally taper.
Use a slightly curved body pose rather than a perfectly straight one, since a gentle S-curve through the spine line suggests motion and life.
Keep pencil pressure light during the earliest guideline stages so mistakes are easy to correct without damaging the paper.
Study two or three different reference photos rather than one, since whale sharks vary slightly in spot pattern and fin shape between individuals.
Practice the fins separately on scrap paper before committing them to the main drawing, especially the dorsal fin, since its angle strongly affects how dynamic the final pose looks.
Common Mistakes Beginners Make
Even with a clear six-step structure, certain errors show up repeatedly in beginner attempts. Recognizing them in advance saves time and frustration.
Drawing the head too narrow, which results in a generic shark silhouette instead of the broad, flattened whale shark head.
Making the dorsal fin too small, which weakens the sense of scale that makes whale sharks visually impressive.
Adding spots before the shading is finished, which often leads to a pattern that looks pasted on rather than integrated into the body.
Skipping the light guideline stage and committing to dark lines too early, which makes proportion corrections much harder later.
Ignoring the tail’s natural asymmetry and drawing a perfectly even fin shape, which reduces the realism of the finished piece.
Frequently Asked Questions
Is this six-step method suitable for children?
Yes. The sequence relies on simple shapes rather than advanced shading or anatomy knowledge, making it appropriate for most school-age beginners with adult guidance for the finer details in steps five and six.
How long does it typically take to finish a whale shark drawing using this method?
Most beginners complete a basic version in thirty to forty-five minutes. Adding detailed shading, spots, and inking can extend the total time to around an hour for a more polished result.
Can this technique be adapted for digital drawing apps?
Yes. The same six-step structure works on a tablet or digital drawing program. Many artists find it even easier digitally, since mistakes can be undone instantly rather than erased by hand.
What is the most common reason a whale shark drawing looks “off”?
Incorrect head width is the single most frequent issue. A head drawn too narrow instantly makes the animal resemble a different, more pointed-nose shark species rather than a whale shark.
Do the spots need to be painted, or can colored pencils work just as well?
Colored pencils work fine, especially for beginners. White gel pens or white colored pencils over a darker background tend to produce the cleanest, most visible spot pattern without needing paint.
Conclusion
A majestic whale shark drawing does not require advanced technique. It requires sequence. By following the 6 Steps To Create A Majestic Whale Shark Drawing For Beginners outlined above, from the initial head-and-back outline through final spots and shading, beginners can consistently produce a recognizable, proportionally accurate illustration on the first serious attempt.
The next step is simple: gather a pencil, paper, and one good reference photo, then work through each stage without skipping ahead to detail too early. Revisit the tips and common mistakes sections after the first attempt, since most improvement happens during the second and third tries once the overall structure feels familiar. With practice, the same six-step framework can be applied to other marine animals, making this method a lasting addition to any beginner artist’s toolkit.