Cat Base Drawing Sketches To Build Your Feline Portrait
A blank page intimidates even skilled artists more than a messy one does. Professional animators and portrait illustrators rarely start with whiskers or fur texture. They start with five or six rough shapes that look nothing like a cat at all. That gap between a lumpy pile of circles and a convincing feline face is exactly what separates frustrated beginners from confident sketchers, and it is the reason the 6 Cat Base Drawing Sketches To Build Your Feline Portrait method has become a standard warm-up routine in art classrooms, online courses, and professional studios alike.
Disclosure: This post contains affiliate links. As an Amazon Associate, we earn from qualifying purchases, and at no extra cost to you.
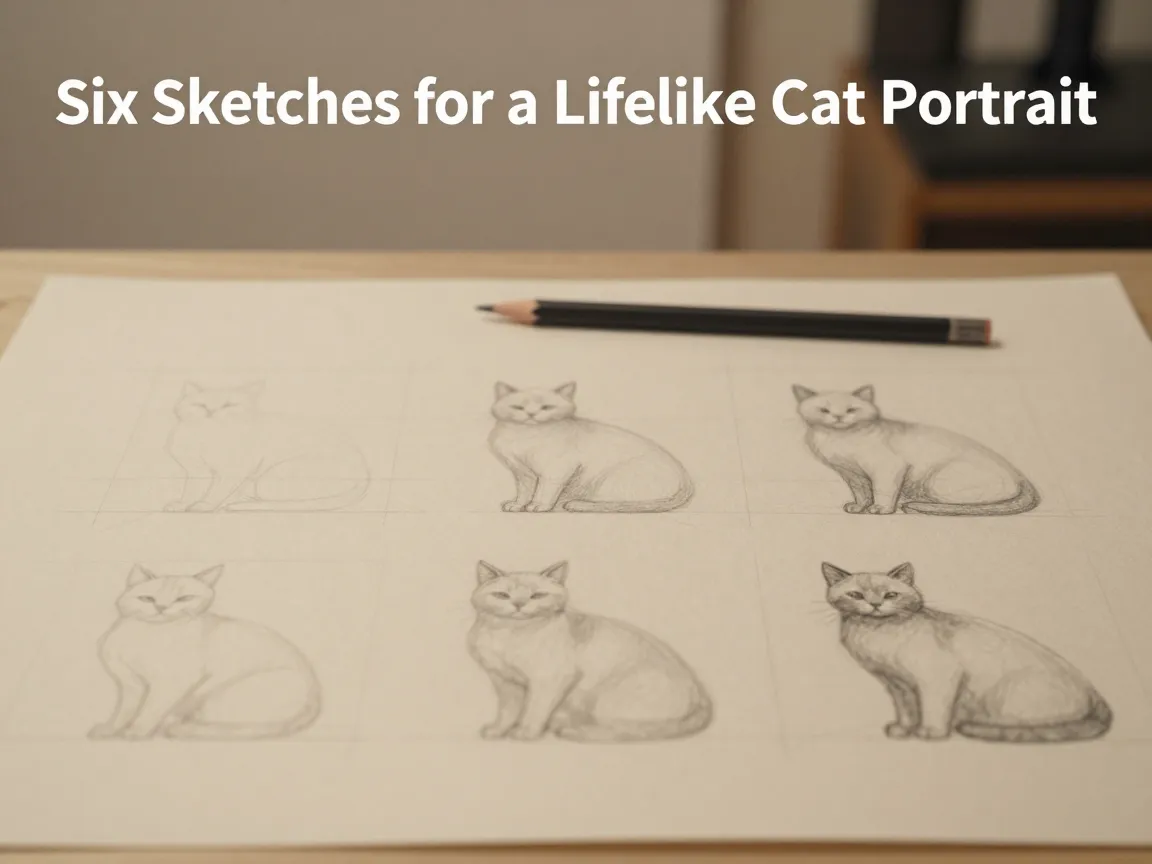
This approach is not about copying a finished cat image line for line. It is a construction method, the same logic figure artists use for the human body, adapted for feline anatomy. Build the skeleton first. Check the proportions. Only then add the fur, the markings, and the personality. The following guide breaks down the six core base sketches that most reputable cat-drawing tutorials converge on, explains why each one matters, and shows how to combine them into a portrait that actually looks alive.
Key Takeaways
- The 6 Cat Base Drawing Sketches To Build Your Feline Portrait method relies on simple shapes, circles, ovals, and lines, laid down before any fur or detail work begins.
- A horizontal baseline and bounding box anchor the pose and keep proportions consistent from the very first marks.
- The head circle, chest oval, and pelvis circle connect through a flexible spine curve to capture the cat’s natural posture.
- Joint circles and limb cylinders prevent stiff, broomstick-looking legs, while the tail curve adds motion and balance.
- Expert illustrators stress gesture before geometry and geometry before detail, a sequence that applies to every skill level, from beginner sketchbook doodles to digital portrait painting.
Why Base Sketches Matter for a Feline Portrait
Cats are deceptively hard to draw because their bodies are built for flexibility. A human skeleton is relatively rigid through the torso, but a cat’s spine can arch, twist, and compress in ways that make freehand sketching unreliable without a framework. Multiple current tutorials, from beginner-focused guides to anatomy-heavy professional resources, agree on one principle: treat the cat as a connected system of circles and ovals before worrying about fur or facial expression.
This is not a shortcut for people who cannot draw realistically. It is the same workflow used in professional animation studios and fine art ateliers. A 25-step tutorial updated in October 2026 walks through a baseline, a bounding box, a head oval, an eye line, and joint circles as sequential construction stages, essentially functioning as a checklist of base sketches before any refinement happens. Another widely referenced anatomy-aware guide insists that gesture lines capturing the spine curve and head tilt must come first, with basic structural shapes layered on top only after the pose reads correctly.
The payoff is proportion control. Skip the base sketch stage and most beginners end up with a head that is too large, legs that do not reach the ground at the same angle, or a tail that looks pasted on rather than growing naturally from the spine. The 6 Cat Base Drawing Sketches To Build Your Feline Portrait framework solves this by forcing every major body part to relate to a shape that was placed deliberately, not guessed.
| Base Sketch Element | Primary Purpose | Common Mistake It Prevents |
|---|---|---|
| Baseline and bounding box | Anchors pose and overall size | Drawing off the page or skewed proportions |
| Head circle with cross | Positions facial features accurately | Eyes, nose, and ears misaligned |
| Chest and torso oval | Establishes rib cage volume | Flat, two-dimensional-looking body |
| Pelvis circle and spine curve | Connects front and back halves naturally | Stiff, broken-looking posture |
| Limb cylinders and joints | Keeps legs proportional and bendable | Stick-figure or uneven legs |
| Tail curve and ear shapes | Adds movement and character | Lifeless, flat silhouette |
6 Cat Base Drawing Sketches To Build Your Feline Portrait Step by Step
Each of the six sketches below builds on the one before it. Work lightly with a pencil or a low-opacity digital layer so corrections stay easy. None of these shapes need to look polished. Their only job is to hold the structure together until the real drawing begins.
1. Baseline and Bounding Box
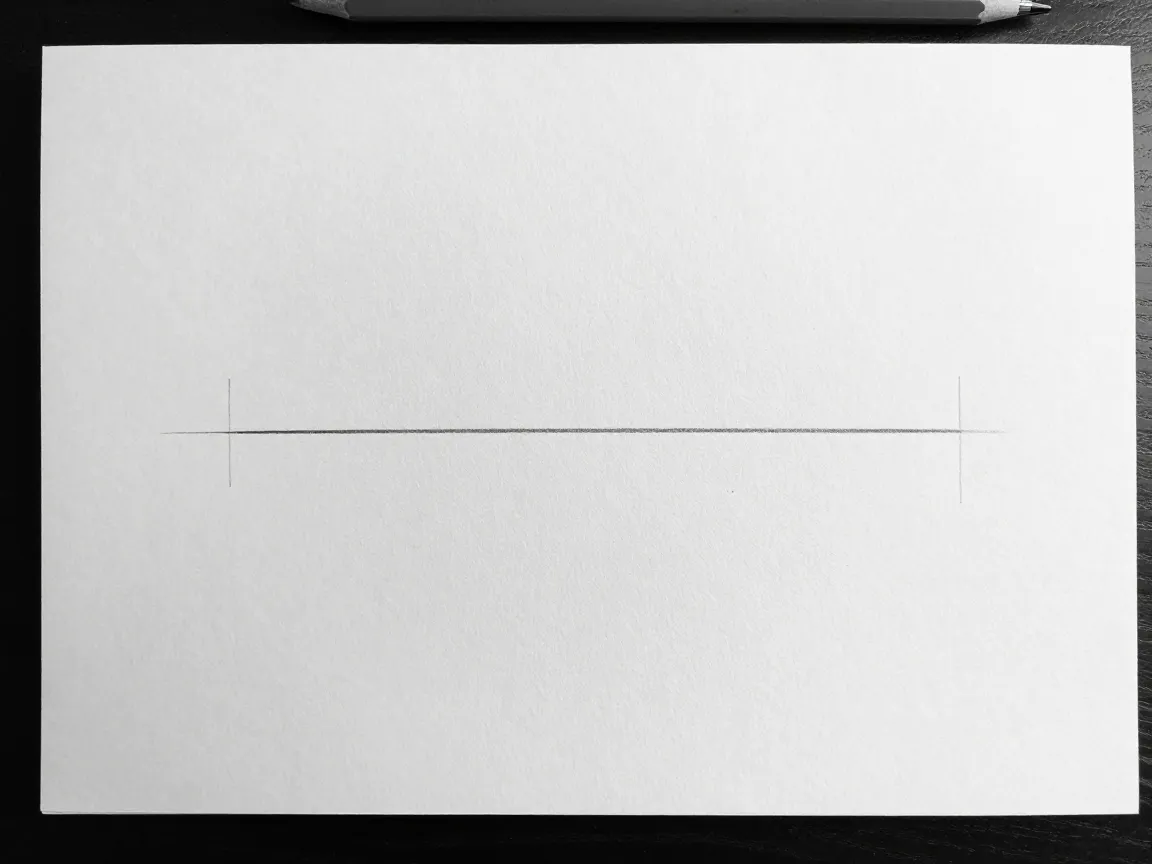
Every strong feline portrait starts with a simple horizontal line and a rectangle. The baseline represents the ground or the surface the cat is sitting, standing, or lounging on. The bounding box marks the top, bottom, left, and right edges of the entire pose. This single step, borrowed directly from a well-known 25-step construction tutorial, keeps proportions controlled before a single curve of fur is drawn.
Skipping this stage is the number one reason beginner sketches drift off balance partway through. Decide early whether the cat will be sitting upright, stretching, or curled into a loaf shape, then size the bounding box accordingly. A sitting cat needs a taller, narrower box. A stretching or walking cat needs a wider, flatter one.
2. Head Circle with Cross Guidelines
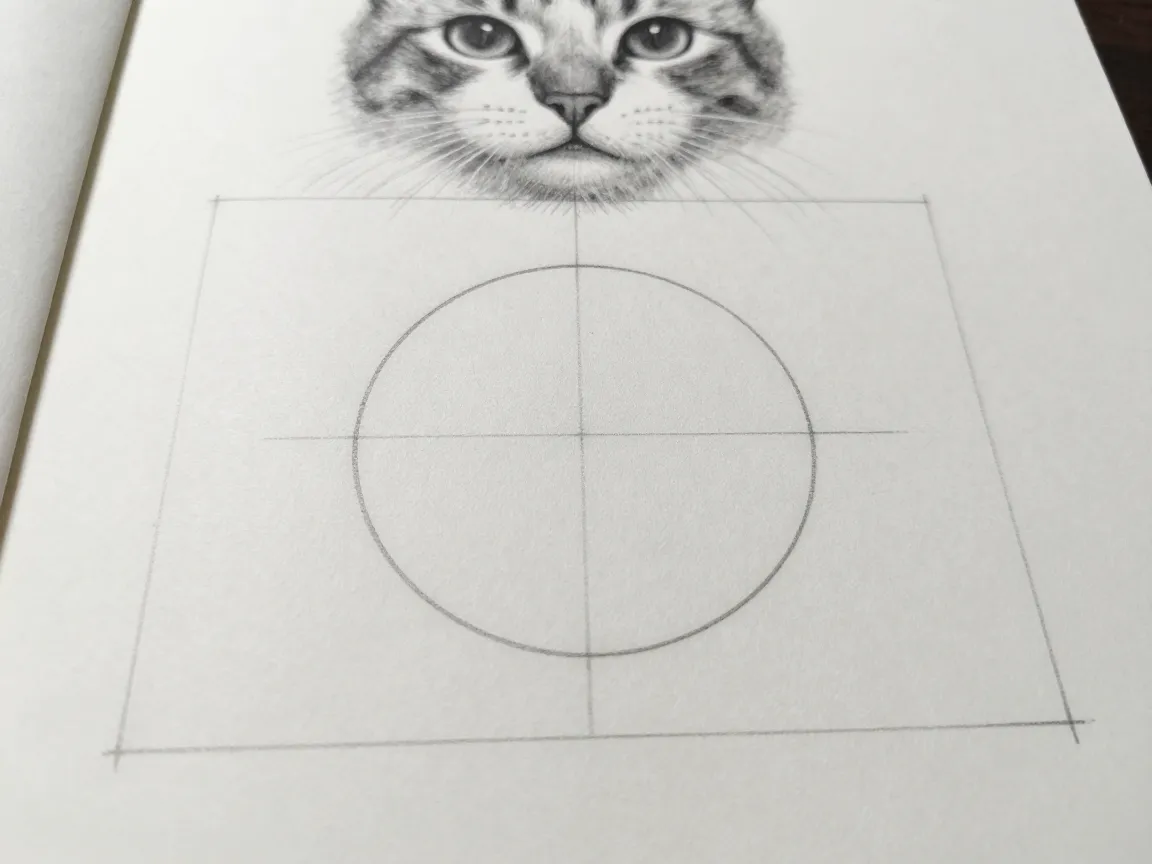
Inside the upper portion of the bounding box, place a circle for the skull. Then divide that circle with a vertical line and a horizontal line, forming a simple cross. This cross is a portrait technique borrowed from human figure drawing, and it works just as well for cats. The horizontal line marks where the eyes sit. The vertical line keeps the nose and chin centered, even when the head tilts.
This base sketch matters most for close-up feline portraits, where even slight asymmetry in the eyes or ears becomes obvious. A recent construction guide recommends this exact cross-division method specifically because it prevents the lopsided look that plagues many first attempts at cat faces.
3. Chest and Torso Oval
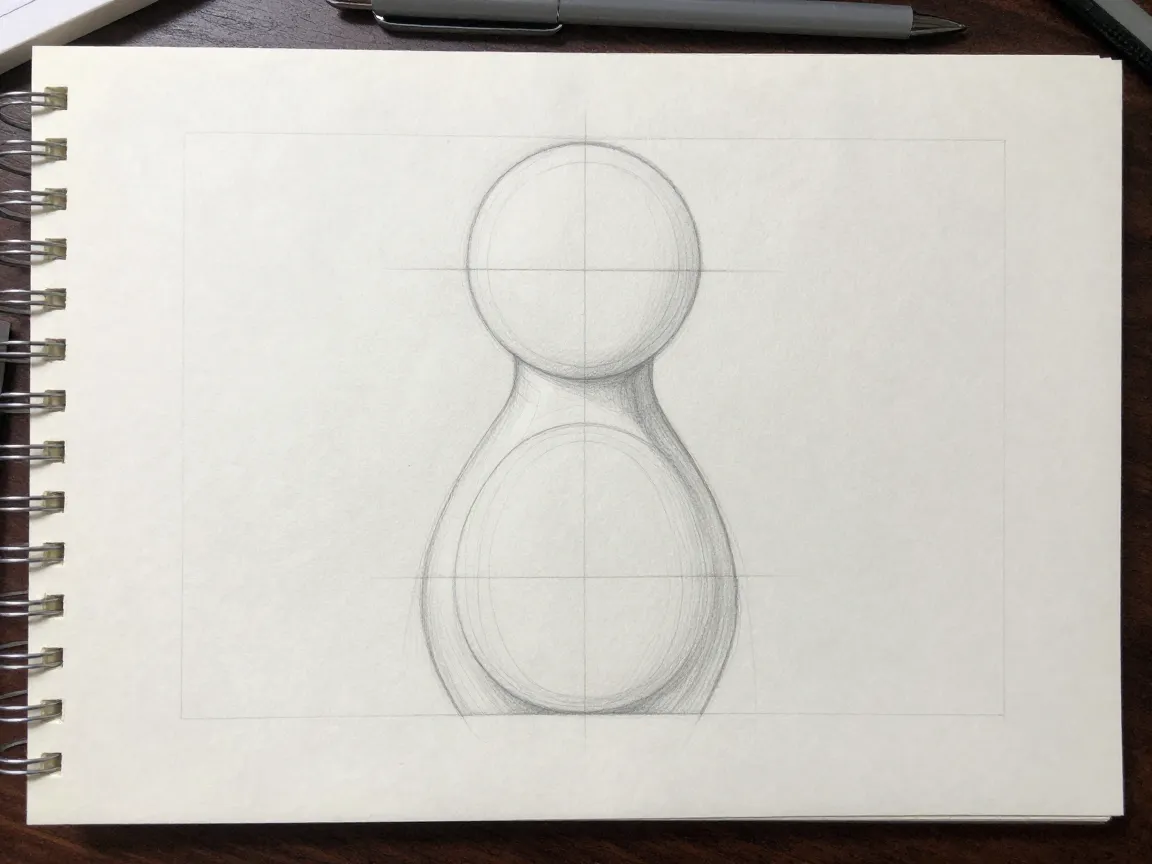
Beneath the head circle, sketch a larger oval to represent the rib cage and chest. This oval should overlap slightly with the head circle or connect to it through a short neck curve, depending on the pose. Several anatomy-focused guides describe this shape as one of the most important in the entire sequence because it establishes the volume of the cat’s front half, the part of the body that carries most of the visual weight in a seated or front-facing portrait.
Angle this oval to match the pose. A cat looking over its shoulder will have a chest oval that twists slightly away from the head circle. A cat facing forward keeps the oval roughly symmetrical beneath the head.
4. Pelvis Circle and Spine Curve
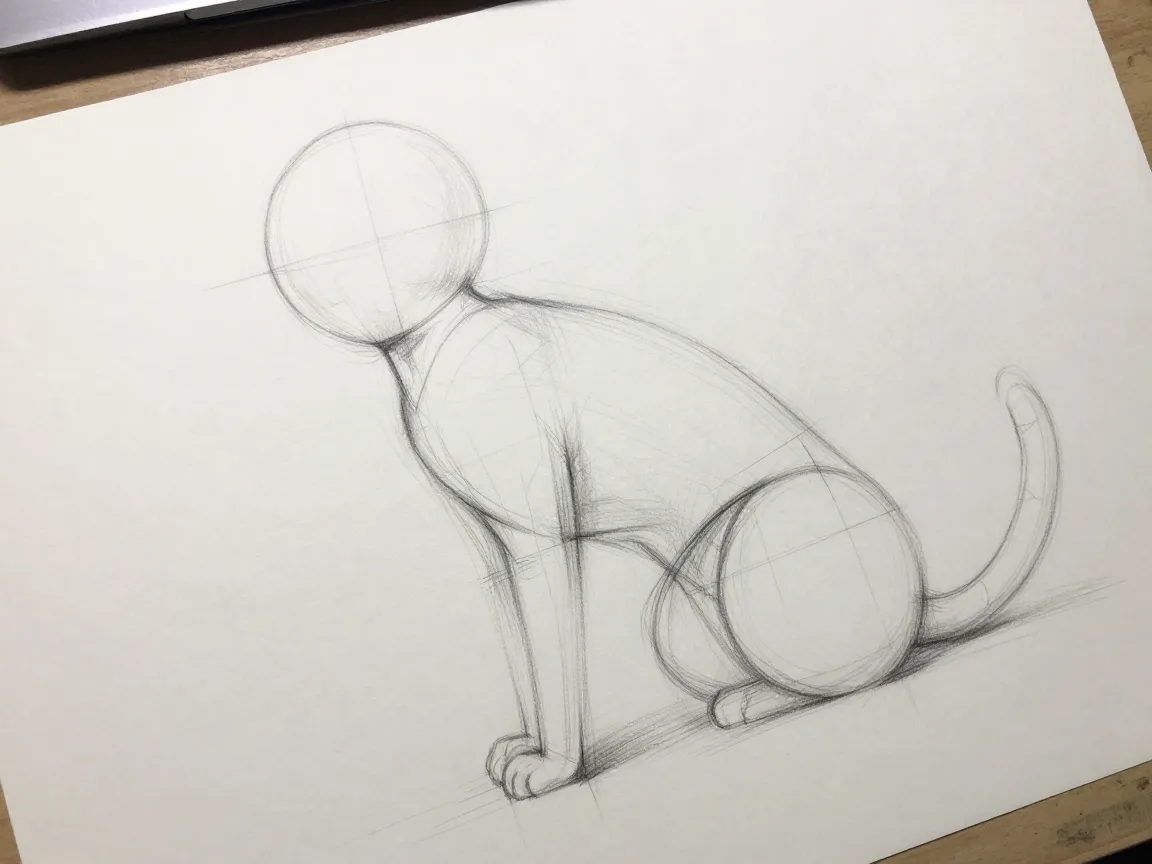
The fourth base sketch is where many tutorials diverge from stiff, mechanical-looking cats and start capturing real feline movement. Draw a smaller circle near the back of the bounding box to represent the pelvis and hind legs’ connection point. Then connect the chest oval to the pelvis circle with a single curved line representing the spine.
This spine curve is not optional decoration. One detailed drawing resource breaks the entire body into a head circle, a tilted chest oval, and a pelvis circle, unified through a curved spine line specifically to create a flexible feline silhouette. Cats rarely hold a perfectly straight back, even when sitting still, so this curve should have a gentle bend rather than a rigid straight line.
5. Limb Cylinders and Joint Circles
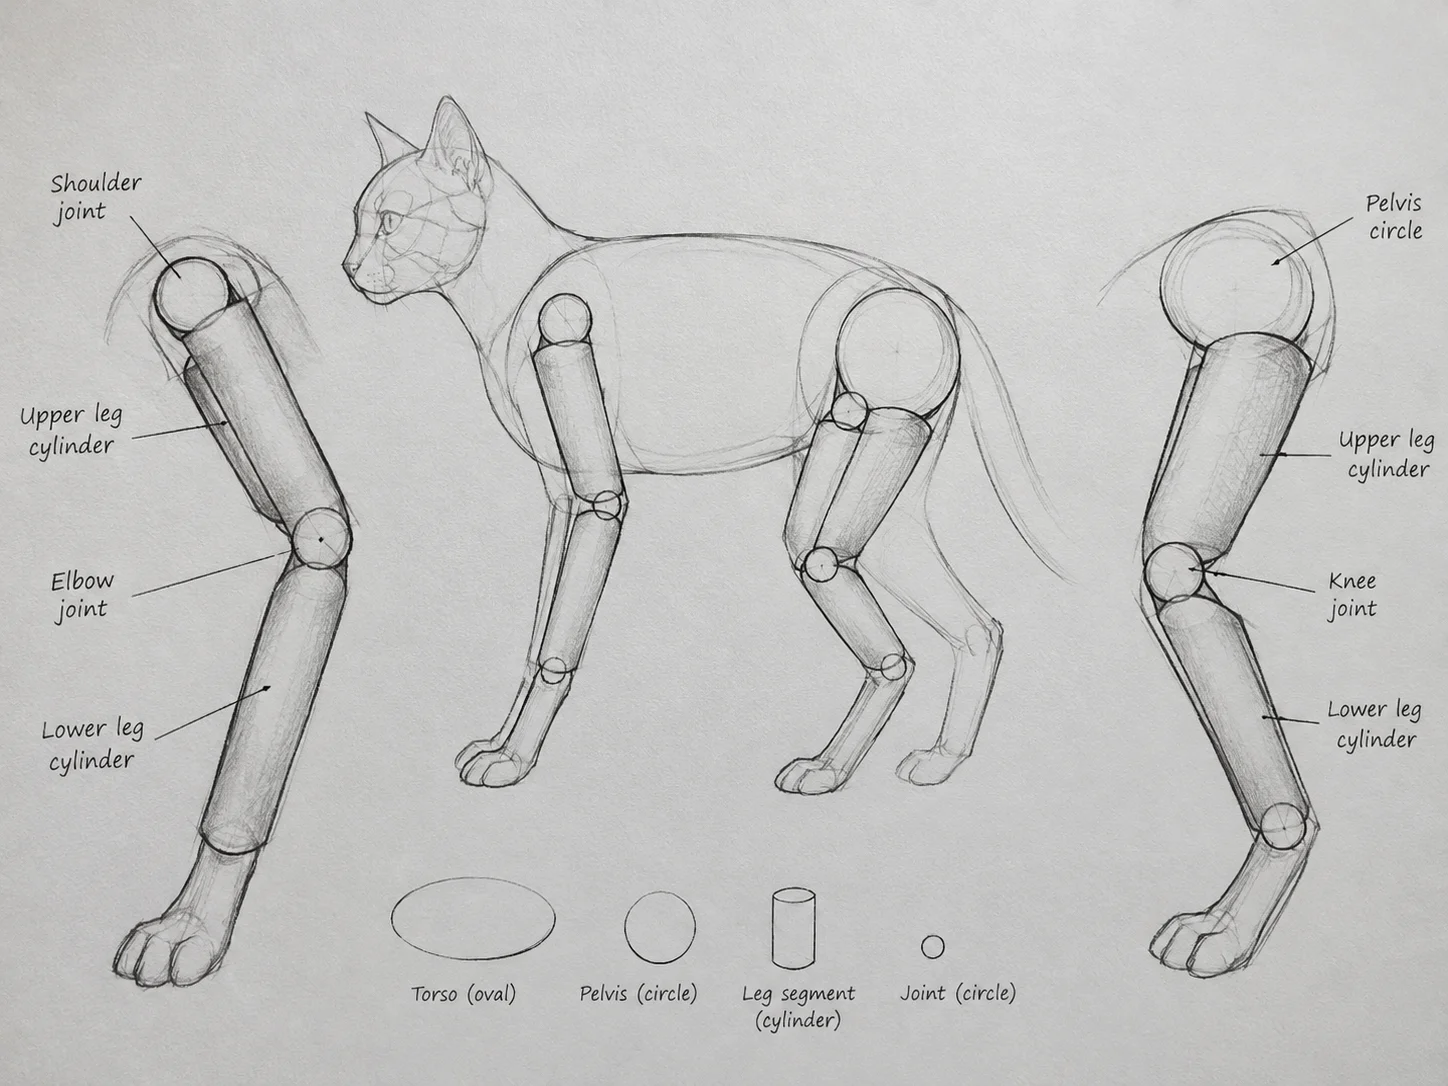
With the torso established, add the legs. Rather than drawing single straight lines, use simple cylinder shapes for the upper and lower leg segments, connected by small circles at the joints, the shoulder, elbow, hip, and knee equivalents. This joint-circle method appears across nearly every reputable tutorial because it solves the most common beginner problem: legs that look like straight sticks glued onto the body.
Pay attention to how many legs are visible in the chosen pose. A front-facing seated cat portrait may only need two front legs fully visible, with the back legs mostly hidden beneath the body. A full-body side view needs all four limbs constructed with matching joint placement so the cat does not appear to be standing at two different heights.
6. Tail Curve and Ear Triangles
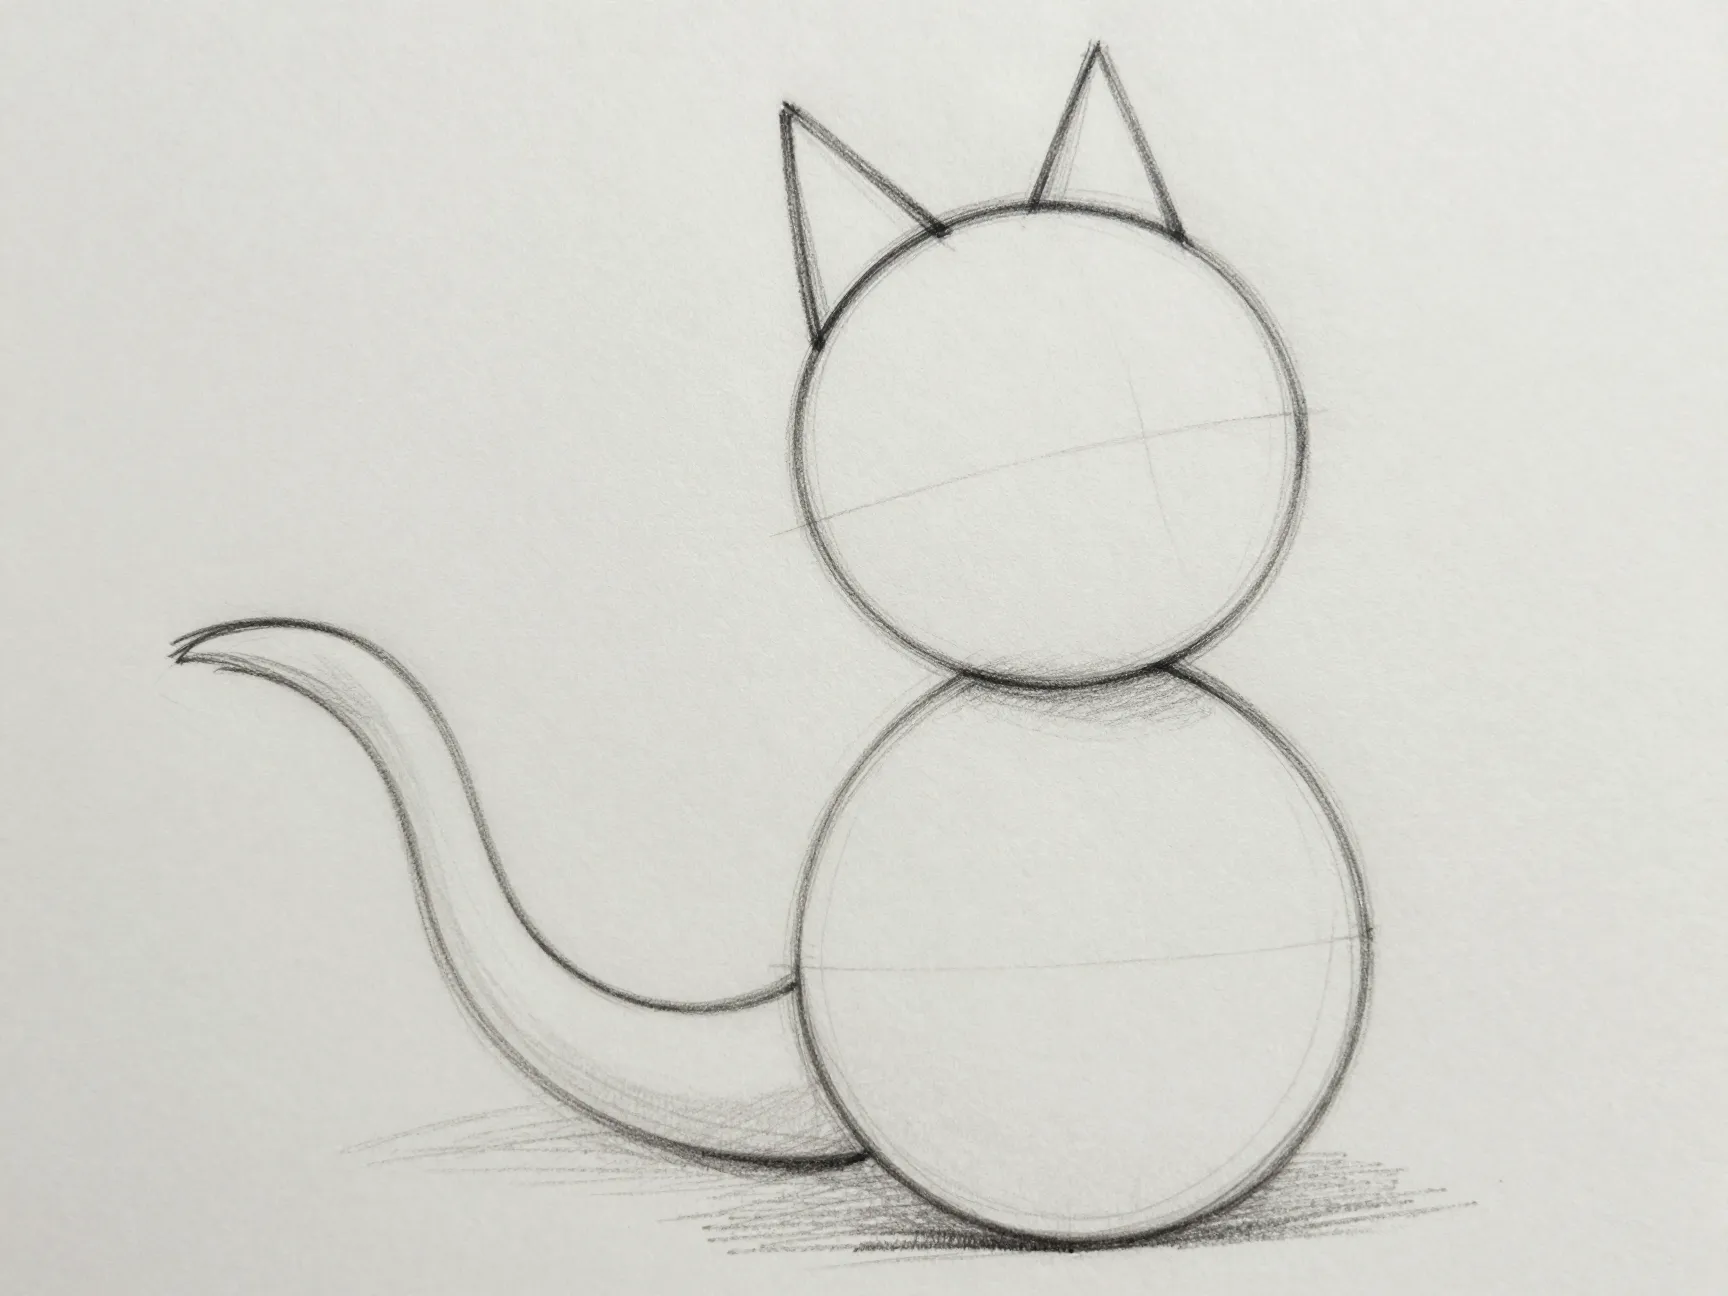
The final base sketch covers the details that give a cat portrait its character: the tail and ears. Draw the tail as a single flowing curved line extending from the pelvis circle, then thicken it slightly once the curve feels balanced. For the ears, two simple triangles placed near the top of the head circle, angled outward, are enough at this stage.
These two elements carry enormous expressive weight. A tail curled tightly around the paws signals a calm, settled cat. A tail held high and slightly curved at the tip signals alertness. Ears rotated slightly to the side suggest curiosity or caution. Because these shapes are quick to draw, many artists sketch two or three tail and ear variations before committing to the one that best matches the intended mood of the portrait.
Turning the Six Base Sketches Into a Finished Feline Portrait
Once all six base shapes are in place, the construction phase ends and the refinement phase begins. This transition is where many beginners rush, eager to erase the guide shapes and jump straight to fur. Slowing down here produces noticeably better results.
Start by establishing base values across the entire cat before adding any fur texture. This means blocking in the general light and mid-tone areas as flat shapes first, the same way a painter blocks in color before adding brush detail. Fur texture added directly onto blank white space tends to look pasted on and flat. Fur texture added on top of established values reads as three-dimensional immediately.
Next, refine the outline. Trace a cleaner silhouette over the rough base shapes, letting the head circle become a slightly more angular cat skull, the chest oval become a softer rib cage curve, and the limb cylinders taper naturally at the paws. Keep the joint circles as reference points even as the outline tightens around them.
Line quality matters more than most beginners expect. Smooth, continuous lines suggest short, sleek fur, the kind found on breeds like the Siamese or the Abyssinian. Broken, slightly jagged lines suggest longer or denser fur, closer to what a Maine Coon or Persian would have. Varying line weight and texture around the same base sketch can produce two completely different-feeling portraits from identical underlying geometry.
Finally, add the facial details using the cross guidelines from the head circle as anchors. Pupils, whisker roots, and the characteristic triangular nose shape should align with the horizontal and vertical guides established earlier. Markings and patterns, tabby stripes, tuxedo patches, or solid color, get added last, painted or drawn over the completed structure rather than guessed at independently.
Pull quote: “Gesture and construction must precede detail. A cat that is not built correctly in its bones will never look convincing no matter how much fur is rendered on top.”
Six Base Sketches Across Different Drawing Styles
The 6 Cat Base Drawing Sketches To Build Your Feline Portrait system is flexible enough to apply across wildly different artistic goals, from cartoon simplicity to photorealistic rendering.
For cartoon and children’s illustration styles, the six base shapes stay large and simplified. The head circle and chest oval often merge into one rounded shape, the joint circles get minimized or dropped entirely, and the tail curve becomes exaggerated for visual charm. Several widely used beginner tutorials for younger artists confirm this simplified head-body-limbs-tail sequence as the standard entry point, proving the same base logic scales down for simpler styles without losing its usefulness.
For realistic portraiture, every one of the six base sketches stays visible longer into the drawing process. Artists working toward photorealism often keep joint circles and the spine curve lightly visible even into the shading stage, using them as checkpoints to verify that added fur and muscle definition have not distorted the underlying structure.
Digital illustration workflows have adapted this same six-shape logic for screen-based tools. One widely used Procreate-based method grids a reference photograph first, then sketches construction lines based on that grid, before switching to a specialized hair-texture brush over a flat gray or colored base layer, even when the final cat will be white. This proves the construction-first principle applies just as strongly in digital media as it does with pencil and paper.
Common Mistakes When Using Base Sketches for a Feline Portrait
Even with six clear base shapes to follow, certain errors show up repeatedly across beginner sketchbooks. Recognizing them early saves significant rework later in the drawing process.
1. Skipping the Bounding Box
Jumping straight to the head circle without first marking overall size boundaries is the single most common mistake. Without a bounding box, the drawing tends to run off one edge of the page or end up oddly small in the center, forcing a complete restart.
2. Drawing the Head Too Large
Most poses call for a head that is noticeably smaller than the chest and torso oval combined. Beginners frequently reverse this ratio, producing a kitten-like oversized head on an adult cat’s body, even when that was not the intended look.
3. Ignoring the Spine Curve
A perfectly straight line between the chest oval and pelvis circle is the fastest way to produce a stiff, taxidermy-like cat. Real feline anatomy almost always includes a gentle curve, even in a standing or alert pose.
4. Forgetting Joint Circles on the Legs
Straight, unbroken lines from hip to paw create the stick-figure effect that makes early attempts look unfinished. The small joint circles take seconds to add and make an enormous difference in how natural the legs appear.
5. Rushing the Tail and Ears
Because these shapes come last in the base sketch sequence, some artists rush through them without testing variations. Since the tail and ears carry much of a cat’s emotional expression, spending extra time here pays off more than almost any other step.
6. Adding Fur Before Establishing Values
Detailed whisker lines and fur strokes applied directly onto an unshaded outline tend to look flat and busy at the same time. Blocking in base light and shadow shapes first, even roughly, gives fur texture something to sit on top of convincingly.
Frequently Asked Questions
How long should the base sketch stage take compared to the detail stage?
For most artists, the six base shapes take a fraction of the total drawing time, often under ten minutes for a simple portrait, while refinement and fur detail can take considerably longer. The base sketch stage is fast by design; its value comes from preventing wasted time later, not from being elaborate itself.
Do all six base sketches need to be visible in the final artwork?
No. These are construction guides meant to be erased or covered by the final linework. Some artists keep faint traces of the spine curve or joint circles visible as stylistic choices, but this is optional.
Can this six-sketch method work for kittens as well as adult cats?
Yes, with proportion adjustments. Kittens generally have a head circle that is proportionally larger relative to the chest oval compared to adult cats, and the limb cylinders are shorter and rounder. The same six-step sequence applies; only the relative sizes change.
Is this method only useful for realistic portraits, or does it work for cartoon cats too?
The method scales well across styles. Cartoon and stylized illustrations typically simplify or merge some of the six shapes, while realistic and anatomical drawings keep each shape distinct for longer into the process.
What tools work best for sketching these base shapes?
Any basic pencil, pen, or digital brush with adjustable opacity works well. Many digital artists use a low-opacity blue or gray layer for the base sketches specifically so these guide shapes are easy to distinguish from the final black or colored linework added afterward.
Conclusion
The 6 Cat Base Drawing Sketches To Build Your Feline Portrait method turns an intimidating subject into a manageable sequence of decisions. A baseline and bounding box set the stage. A head circle with cross guidelines locks facial proportions in place. A chest oval and pelvis circle, joined by a spine curve, give the body its natural flexibility. Limb cylinders with joint circles keep legs believable, and a tail curve with simple ear triangles inject personality before a single whisker gets drawn.
This is not a rigid formula reserved for professional illustrators. Beginner-focused tutorials, anatomy-driven guides, and digital painting workflows all converge on this same base-sketch logic because it consistently produces stronger results than jumping straight to detail. The next cat portrait attempt should start the same way: six light, simple shapes, checked for proportion and pose, before a single strand of fur gets added. Keep a reference photo nearby, work loosely through the construction stage, and resist the urge to rush toward detail. That patience at the base sketch stage is what separates a stiff drawing from a feline portrait that genuinely feels alive.