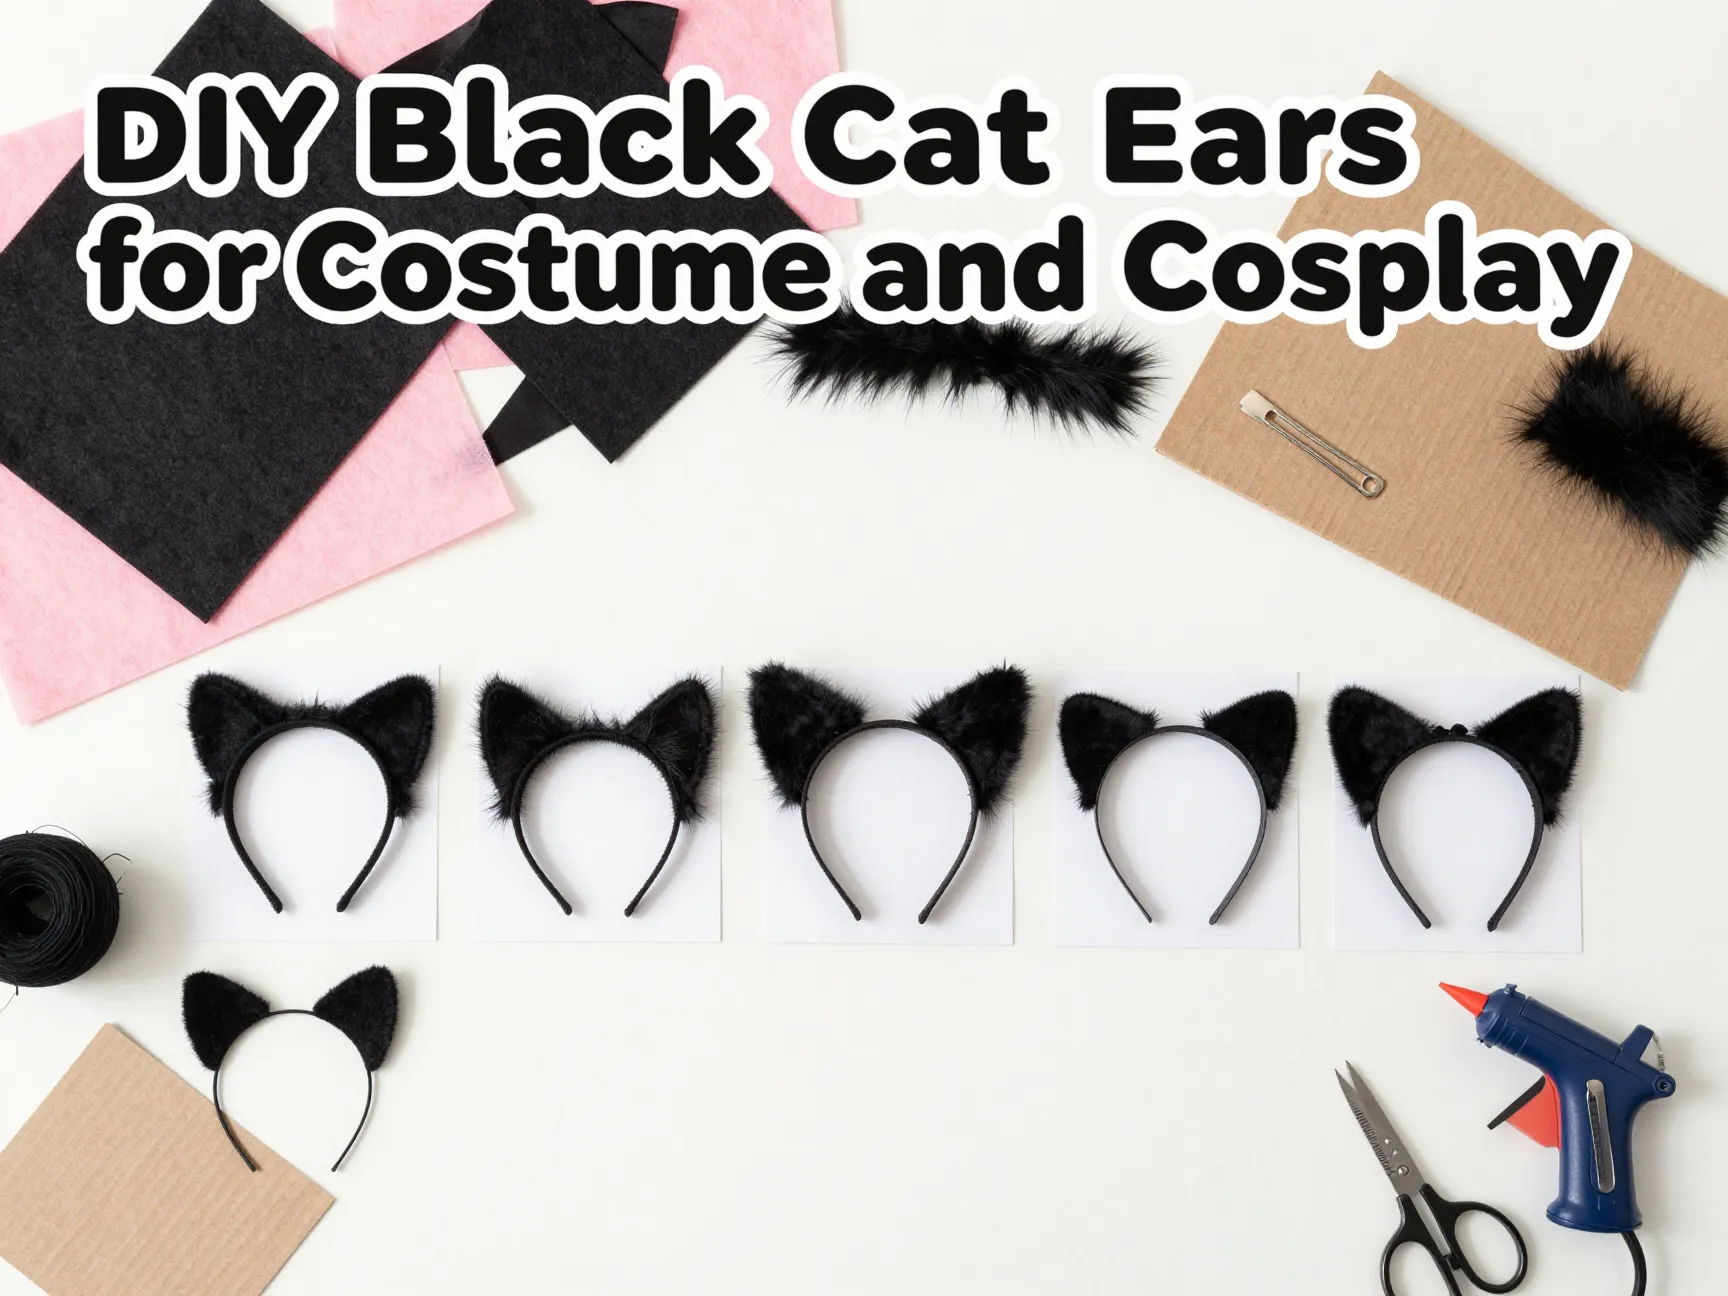
DIY Black Cat Ears Projects for Your Next Costume or Cosplay
A pair of cat ears costs less than a cup of coffee to make, yet it can transform an outfit from “just wearing black clothes” into an unmistakable feline costume. That is the quiet power of a well-made ear: it does more visual work per square inch than almost any other costume piece. This guide walks through 6 DIY Black Cat Ears Projects for Your Next Costume or Cosplay, ranging from five-minute paper crafts for kids to structured, sewn ears built for serious cosplay durability.
Disclosure: This post contains affiliate links. As an Amazon Associate, we earn from qualifying purchases, and at no extra cost to you.
Whether the goal is a last-minute Halloween outfit, a school costume parade, or a convention-ready cosplay look that needs to survive a full day of photos, one of these six methods will fit the timeline, budget, and skill level. Each project below uses materials most crafters already have on hand, such as felt, cardboard, construction paper, or an old headband, and none require advanced sewing experience.
Key Takeaways
- There are five dominant construction styles for DIY cat ears: felt headband ears, structured fabric ears, paper craft ears, clip-on ears, and upcycled cardboard ears.
- Felt and hot glue remain the fastest, most beginner-friendly combination for building costume-grade ears in under 30 minutes.
- Structured, sewn ears hold their shape better over a full event and are worth the extra time for cosplay use.
- Clip-on ears avoid headband dependency and work well for people who want the ears to sit closer to natural hair.
- Upcycled materials like old cardboard boxes or worn-out bathrobes cut costs to nearly zero while adding sturdy structure.
Choosing a Method Before Starting Your DIY Black Cat Ears Project
Not every cat ear needs to be built the same way. The right approach depends on how much time is available, whether the ears need to survive dancing or running around at a party, and whether the wearer is a toddler or an adult heading to a cosplay convention. Before diving into the 6 DIY Black Cat Ears Projects for Your Next Costume or Cosplay covered in this guide, it helps to understand the five basic construction families these projects draw from.
Felt headband ears are the fastest and most forgiving option, ideal for anyone who has never made a costume piece before. Structured fabric ears take longer but produce a more polished, dimensional look that photographs well. Paper craft ears are best suited for young children and short-term wear. Clip-on ears solve the problem of headbands sliding around or clashing with wigs. Upcycled cardboard ears are the budget champion, built from materials already sitting in a recycling bin.
The table below summarizes how these approaches compare on the factors that matter most when planning a costume.
| Method | Build Time | Durability | Best For |
|---|---|---|---|
| Felt headband | 15 to 20 minutes | Moderate | Beginners, quick costumes |
| Structured fabric | 45 to 60 minutes | High | Cosplay, photo-heavy events |
| Paper craft | 10 minutes | Low | Kids, single-use wear |
| Clip-on board | 20 to 30 minutes | High | Wig-wearers, no headband |
| Upcycled cardboard | 30 to 40 minutes | Very high | Budget builds, reused materials |
With that framework in mind, the following six projects give a concrete plan for each style, including materials, steps, and tips gathered from current costume tutorials that have been tested and updated through 2026.
The 6 DIY Black Cat Ears Projects for Your Next Costume or Cosplay
Each of the six projects below is written as a self-contained tutorial. Pick the one that matches the available time and skill level, or mix techniques, for example pairing structured ears with a clip-on attachment for extra hold.
1. Paper Plate Cat Ears for Fast Kid-Friendly Costumes
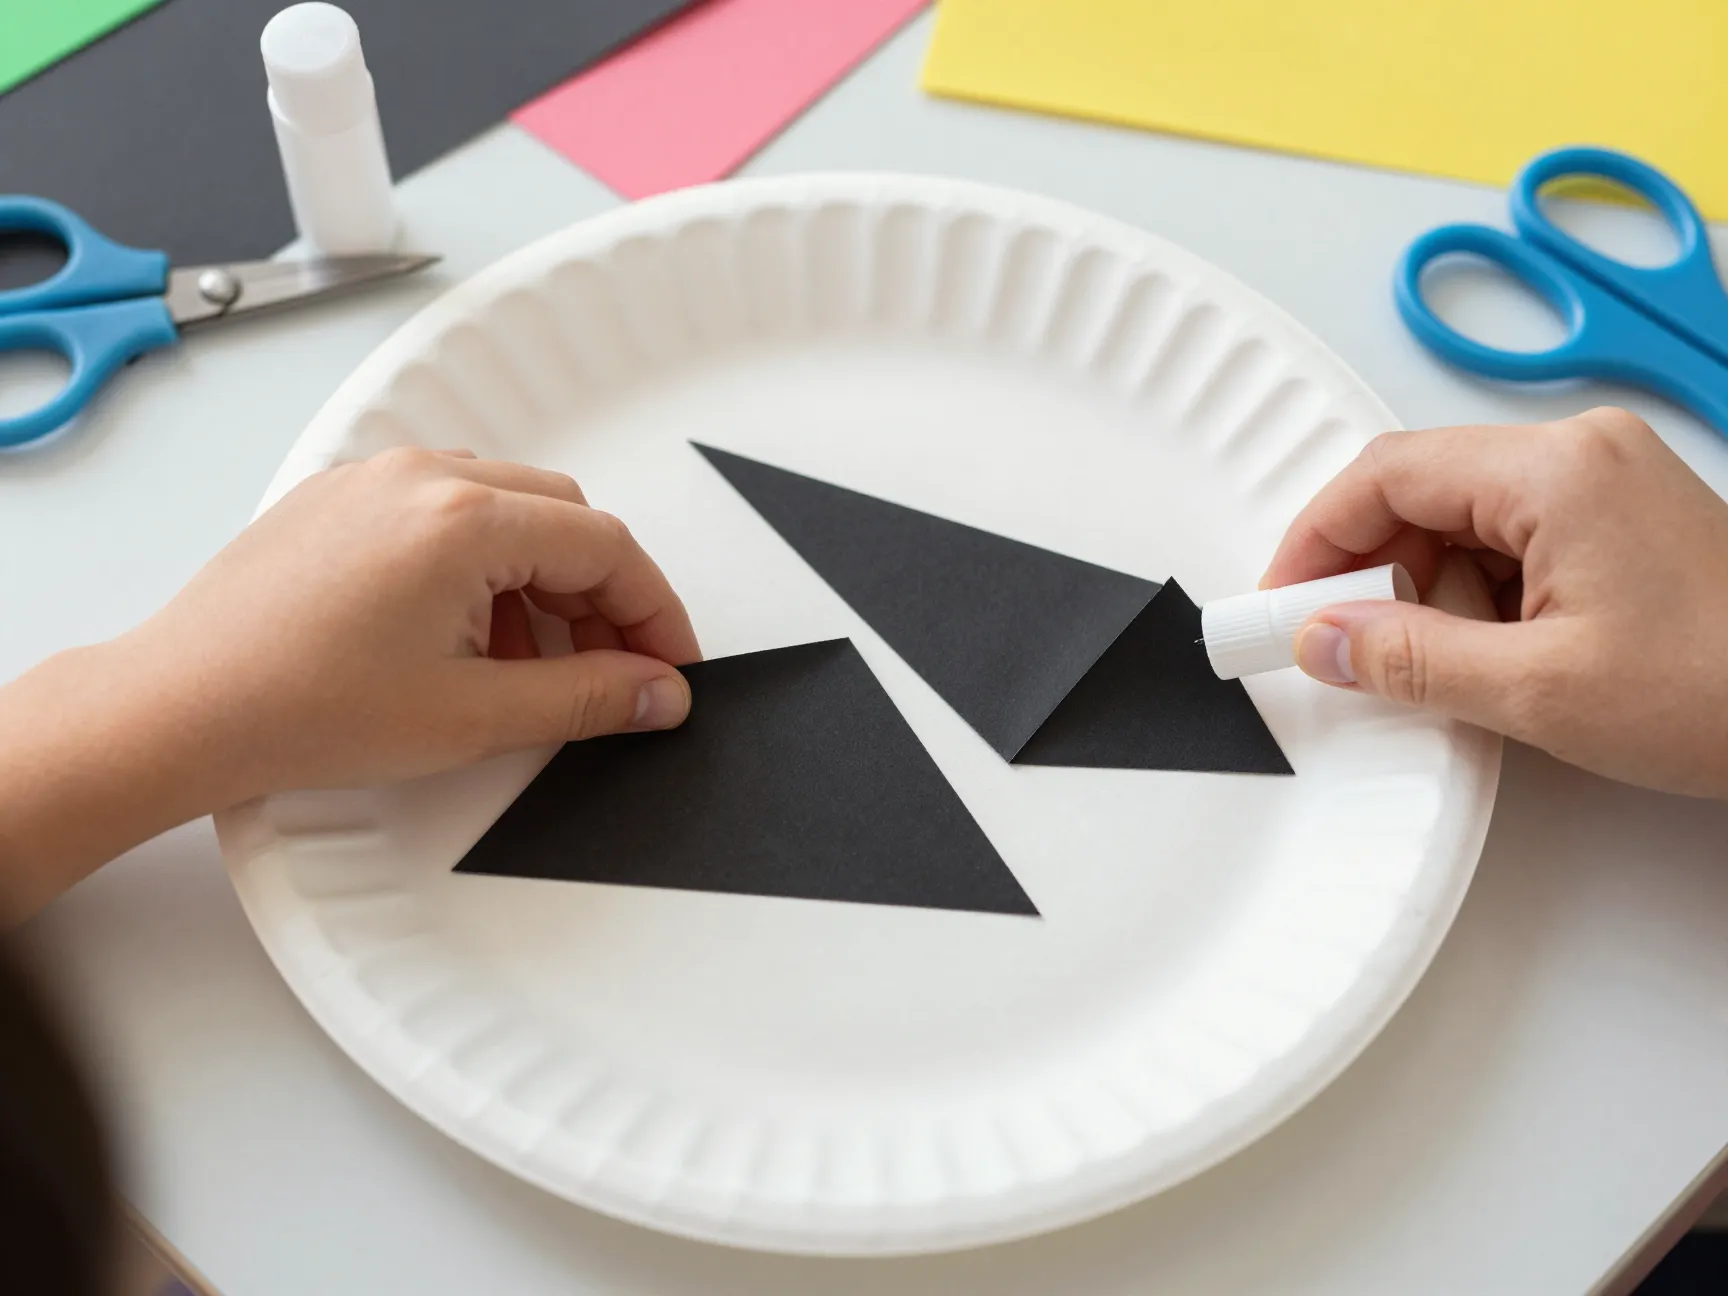
This is the simplest of the 6 DIY Black Cat Ears Projects for Your Next Costume or Cosplay, and it is built almost entirely from a paper plate and black construction paper. It works well as a full mask-style face piece or can be trimmed down to just the ears for attaching to a plain headband.
Materials needed:
- One white or black paper plate
- Black construction paper
- Scissors and a glue stick
- Optional pink paper for inner ear detail
To build it, cut two triangle shapes from black construction paper roughly three inches tall. Fold a small tab at the base of each triangle so it can be glued flat against the back of the plate rather than sticking straight up unsupported. Position the two ears near the top edge of the plate and glue the tabs down firmly, holding each one in place for about ten seconds while the glue sets.
This method is popular in classroom and preschool craft settings because it requires no cutting tools sharper than blunt-tip scissors and no heat sources like a glue gun. The tradeoff is durability. Paper ears will not survive rain, heavy play, or repeated wear, so this project is best reserved for a single afternoon event or a photo session rather than an all-day costume.
2. Felt Headband Cat Ears With a Free Template
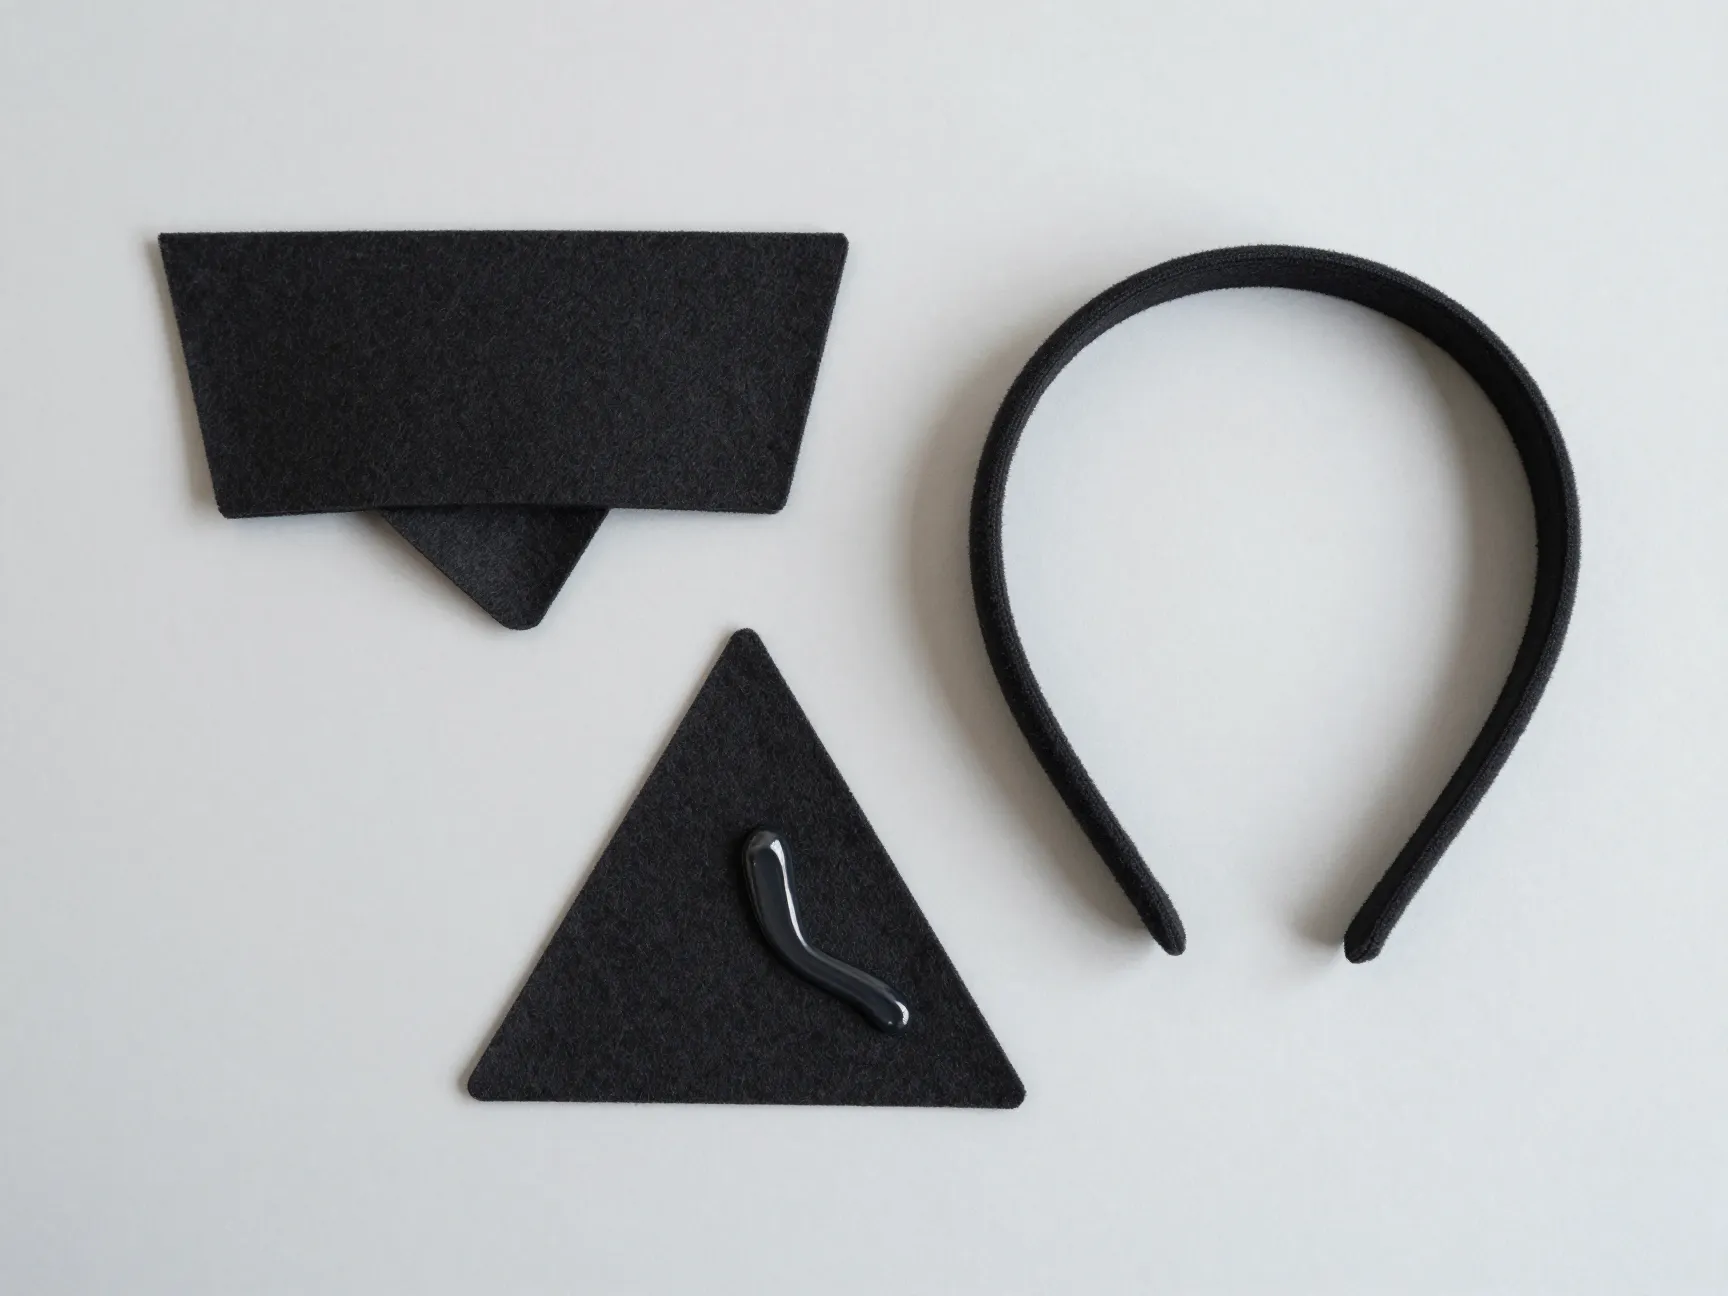
Felt headband ears are the workhorse of Halloween costuming, and for good reason. They take under twenty minutes, require no sewing machine, and hold up far better than paper.
Start with a plain black headband, a sheet of black felt, and a hot glue gun. Many costume blogs offer free printable ear templates online, but a template is not strictly necessary. A rough triangle roughly four inches tall with slightly rounded corners works fine freehand.
Steps:
- Cut two matching triangle shapes from black felt.
- Fold the bottom third of each triangle inward to create a slight cup, then dab a small amount of hot glue inside the fold to hold the curve.
- Position both curved ears along the top of the headband, spacing them to match natural ear placement.
- Apply hot glue to the base of each ear and press firmly against the headband for fifteen seconds.
Because the felt is glued rather than sewn, this project is fully reversible if adjustments are needed later. It is also the easiest of the 6 DIY Black Cat Ears Projects for Your Next Costume or Cosplay to scale up for a group costume, since the same template can be reused for multiple headbands in one sitting.
3. Structured Fabric Ears for a Polished Costume Look
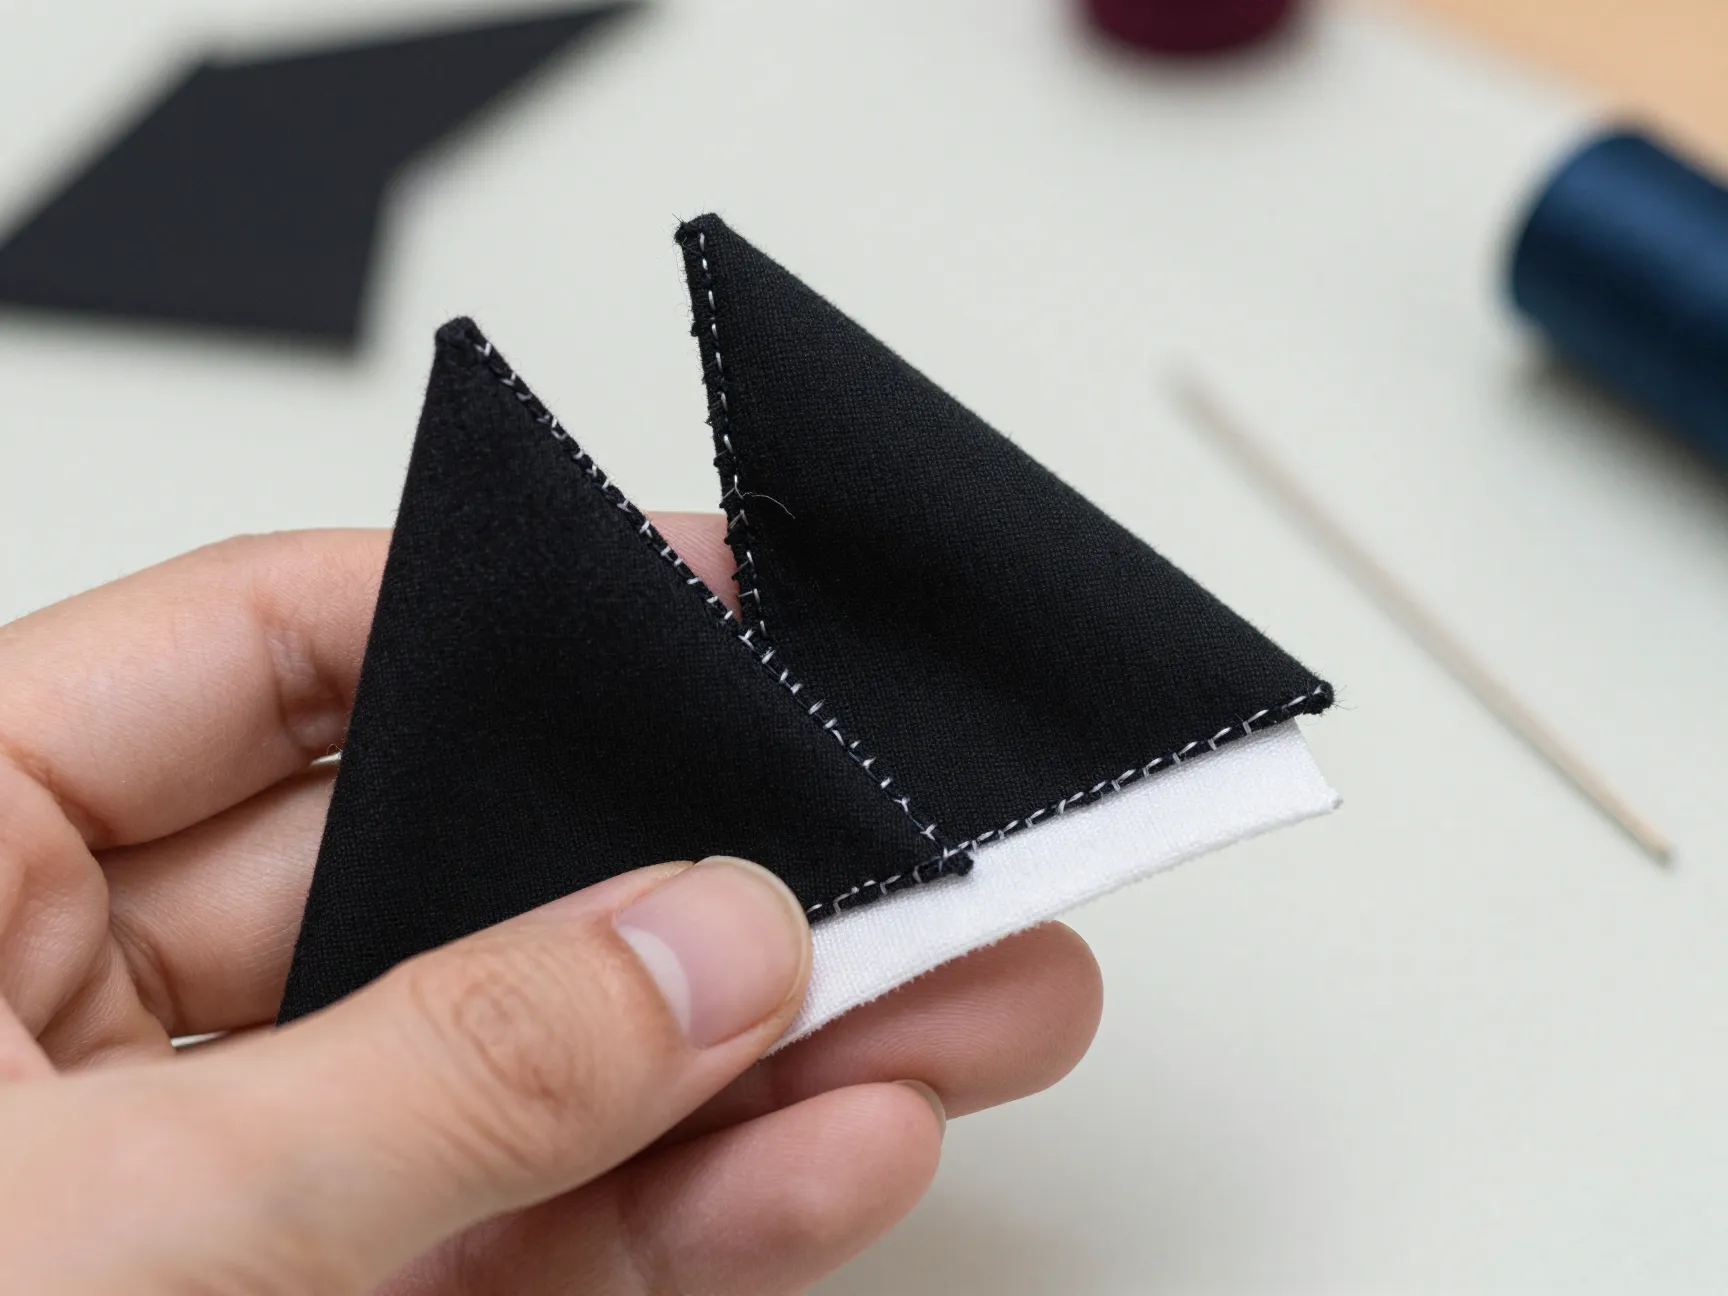
For anyone wanting a costume-grade rather than craft-grade finish, structured fabric ears are worth the extra effort. This method uses front and back fabric pieces sewn or glued together, giving the ear real dimension instead of a flat felt triangle.
Materials:
- Black fabric, cut into four triangle pieces (two per ear)
- A sewing needle and thread, or fabric glue as an alternative
- Light stuffing or a stiff interfacing layer for shape
- A headband or clip base
Cut a triangle template roughly four to five inches tall with a slightly curved base. Cut two pieces per ear, one for the front and one for the back. Sew or glue the pieces together along the edges, leaving the bottom open. Insert a small strip of stiff interfacing or a pinch of stuffing before closing the base, which helps the ear hold its cupped shape rather than flopping over during the day.
This structured approach takes closer to an hour to complete, but the payoff is an ear that keeps its shape through hours of wear, dancing, and photos, making it a strong choice for cosplay events where the costume needs to hold up on camera.
4. Hot-Glued Felt Ears With Pink Inner Detail
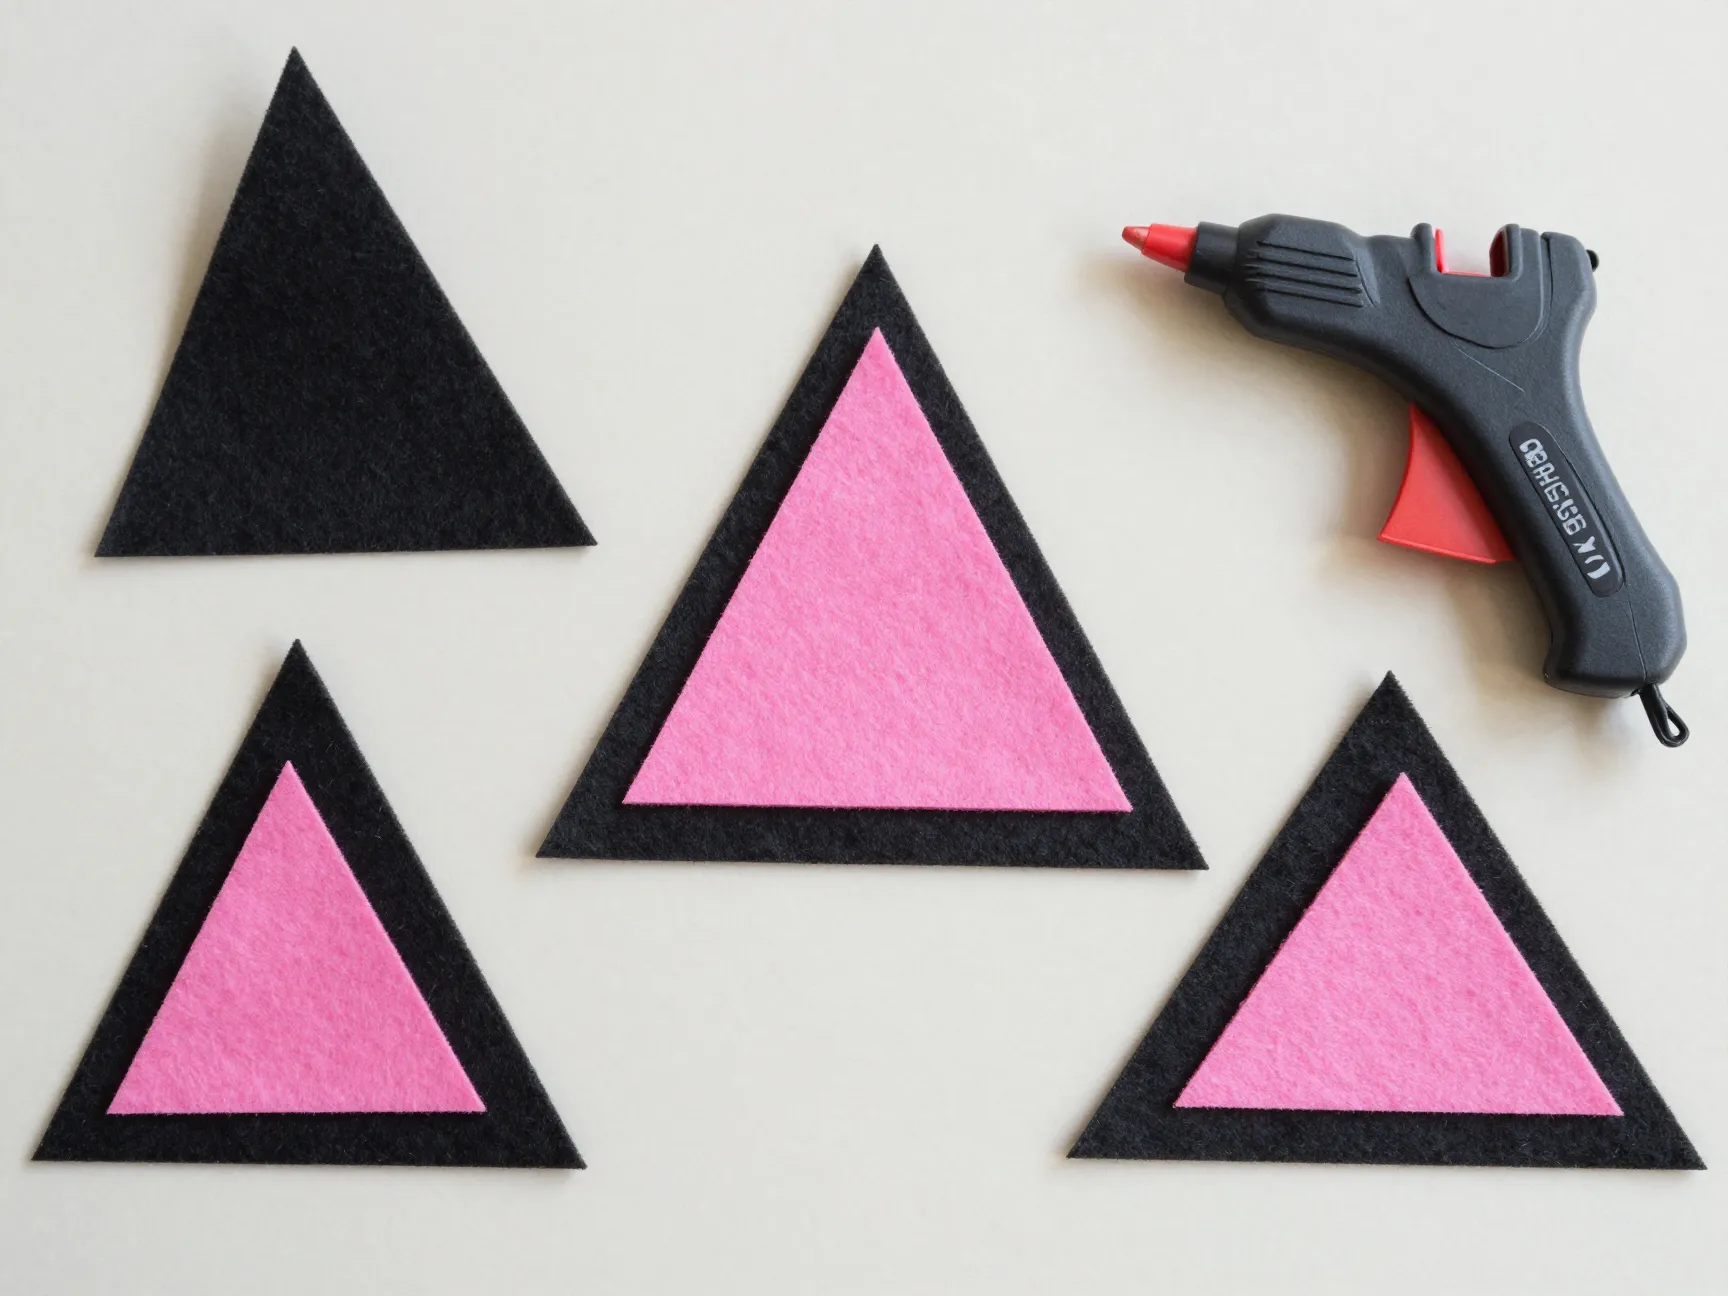
This project builds on the basic felt method but adds a layer of realism through color contrast. It uses four black felt pieces and two smaller pink felt pieces, glued together in layers to mimic the look of a real cat ear.
Steps:
- Cut four black felt triangles, roughly matching size for the front and back of each ear.
- Cut two smaller pink felt triangles sized to fit inside the black pieces, leaving a black border visible.
- Glue one pink piece centered onto one black piece per ear, creating the inner-ear detail.
- Sandwich this pink-and-black layer against a second plain black piece, gluing around the edges to hide any raw felt seams.
- Attach the finished dimensional ears to a headband using hot glue.
Because this version uses four pieces of black felt and two pieces of pink felt rather than a single flat triangle, the finished ears sit slightly thicker and hold their shape better than the basic version in project two. This makes it a good middle-ground option among the 6 DIY Black Cat Ears Projects for Your Next Costume or Cosplay, sitting between the fast felt headband and the more time-intensive structured fabric build.
5. Clip-On Satin and Fuzzy Ears for Secure Cosplay Wear
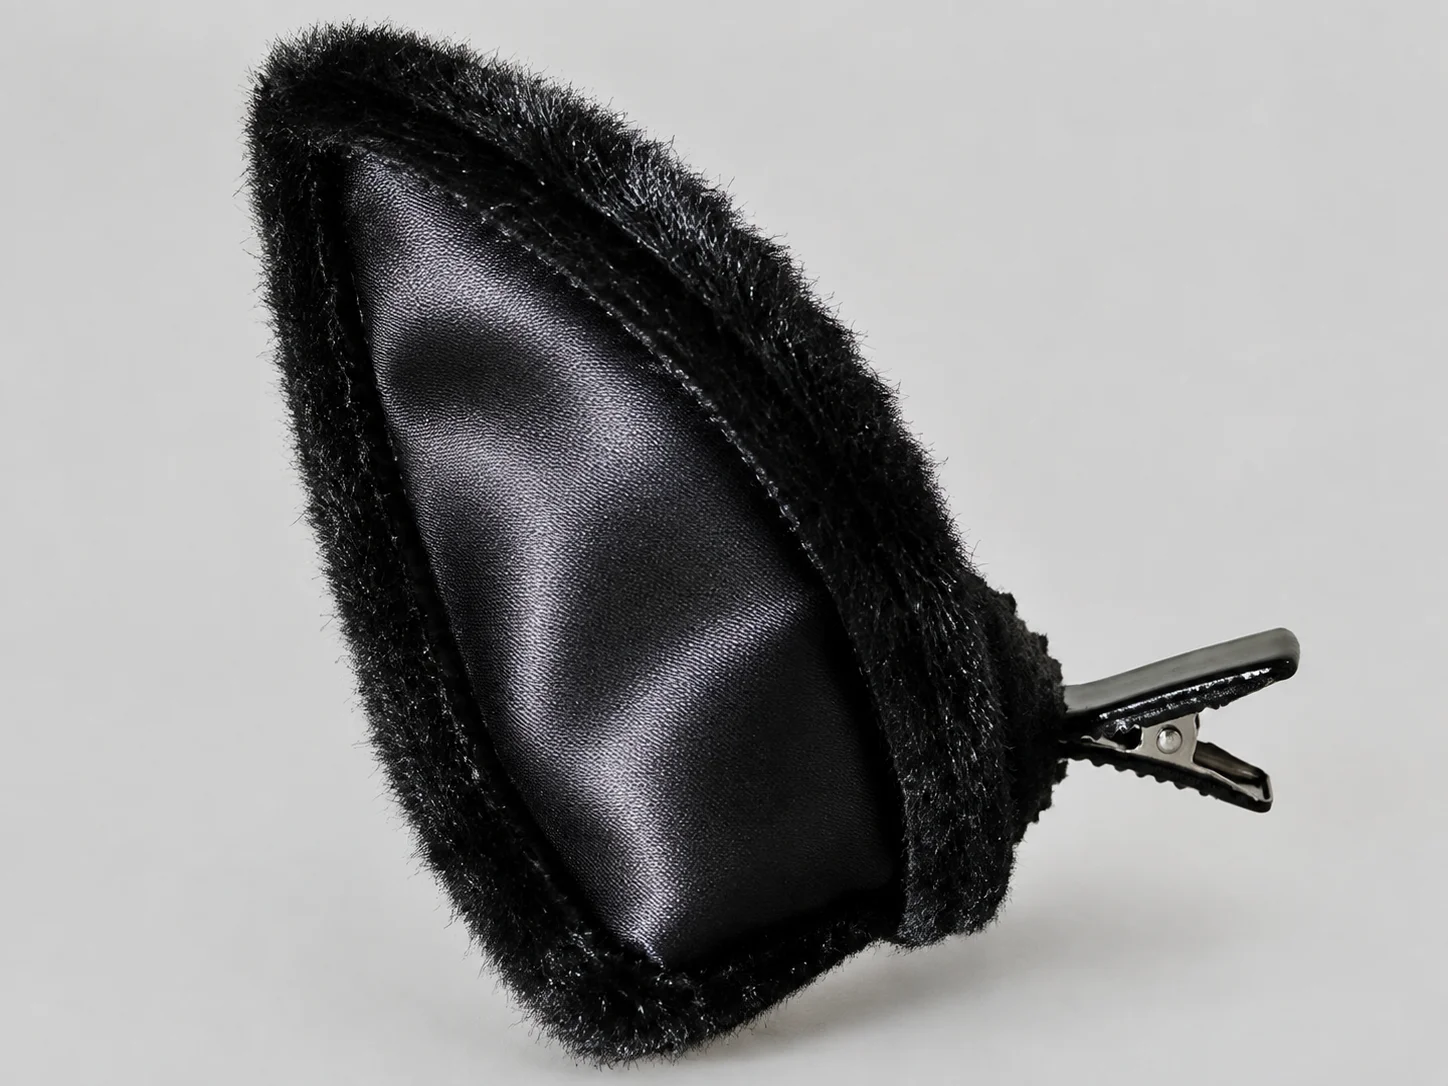
Headbands are convenient, but they can slip on wigs, clash with certain hairstyles, or feel bulky under a hood or hat. Clip-on ears solve that problem by attaching directly to hair using a small metal clip.
This version also adds a satin layer stitched over the felt base for extra shine, plus a fuzzy trim along the edges for texture.
Materials:
- Black felt, cut into ear-shaped pieces
- A small piece of black satin fabric, slightly smaller than the felt shape
- Fuzzy trim or faux fur strips
- A metal hair clip
- Needle and thread, plus a hot glue gun
Stitch the satin piece onto the front of the felt base first, since sewing gives a cleaner finish than glue on shiny fabric. Trim the outer edge with a thin strip of fuzzy material, gluing it around the perimeter for texture. Once the ear shape is complete, hot glue a metal hair clip to the back center of the ear. Press the clip flat and hold for about twenty seconds so the glue bonds securely to both the clip and the felt.
This project takes a bit more patience because of the stitching step, but the combination of sewn satin plus hot-glued fuzzy trim creates a durable ear that will not come apart from friction the way a fully glued version might. The clip attachment also means the ears sit closer to the head than a headband version, which many cosplayers prefer for character accuracy.
6. Upcycled Cardboard and Bathrobe Ears for Sturdy Structure
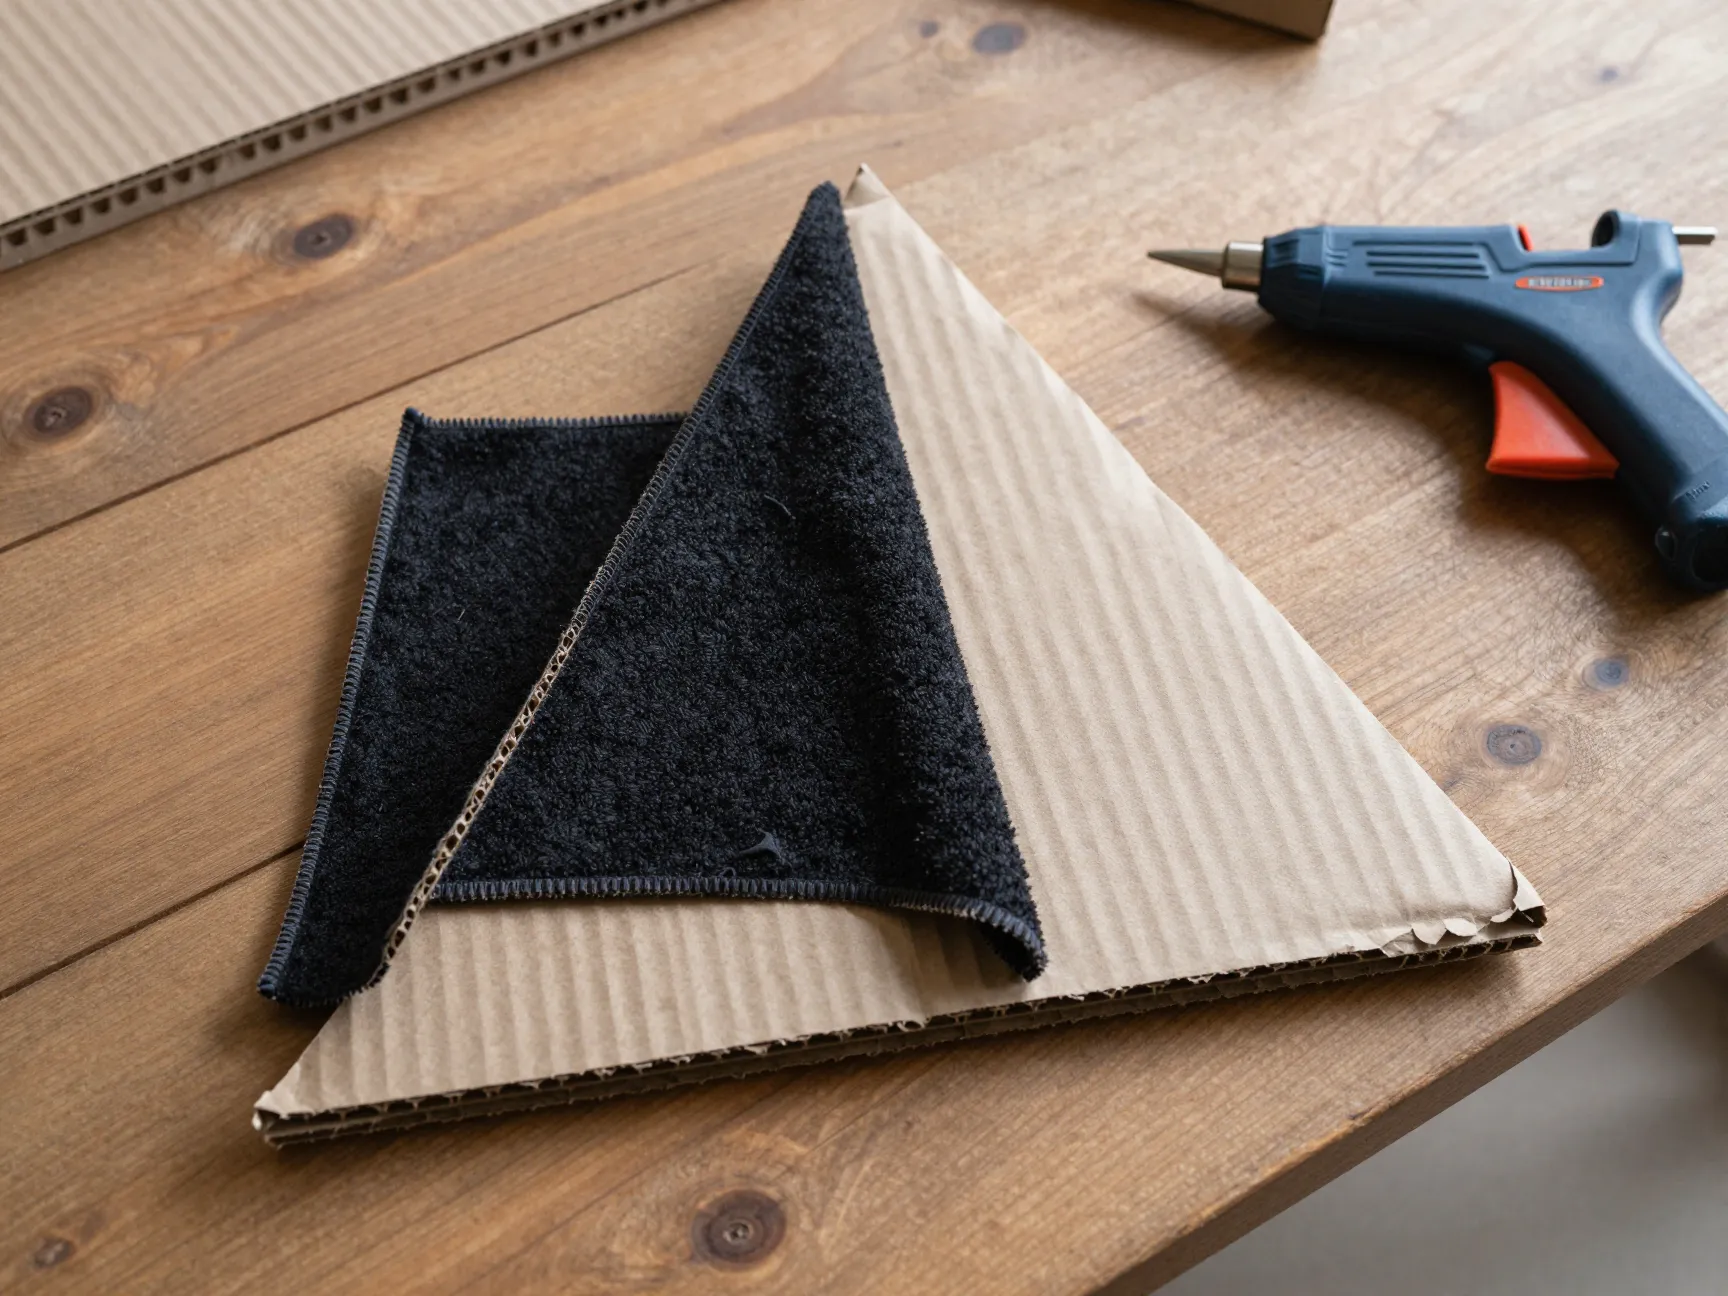
The last of the 6 DIY Black Cat Ears Projects for Your Next Costume or Cosplay is also the most budget-conscious, built almost entirely from materials that would otherwise be thrown away. This method uses cardboard triangles as an internal skeleton, then covers them with fabric cut from an old black bathrobe, T-shirt, or any scrap black material.
Steps:
- Cut two triangle shapes from a flattened cardboard box, roughly four inches tall.
- Cut fabric pieces slightly larger than the cardboard triangles, leaving about half an inch of extra fabric on all sides.
- Wrap the fabric around each cardboard triangle like wrapping a small package, gluing the folded edges to the back of the cardboard.
- Attach the finished cardboard-and-fabric ears to a plain headband using hot glue, reinforcing the base with an extra strip of fabric or tape if needed for stability.
Cardboard gives these ears a rigidity that felt alone cannot match, so they tend to hold their upright shape through an entire evening without drooping. This is also the most sustainable option among the six, since it repurposes packaging material and worn-out clothing instead of buying new supplies. As sustainability continues to shape craft and costume trends, expect more tutorials in the coming years to lean further into upcycled patterns like this one.
Tips for Making DIY Cat Ears Last Through a Full Event
A great pair of ears can still fail if the attachment method is weak or the materials were not suited to hours of wear. A few practical adjustments make any of the six projects above noticeably more durable.
First, always let hot glue cool for a full thirty seconds before moving or testing an ear. Glue that looks solid on the surface can still be warm and soft underneath, and testing too early is the most common reason ears come apart mid-event. Second, reinforce the base of any headband-mounted ear with a small strip of fabric or felt glued across the seam where the ear meets the headband. This extra layer distributes stress across a wider area instead of concentrating it at one glue point.
Third, for clip-on ears, choose a metal clip rather than a plastic one. Metal clips grip hair more firmly and are less likely to snap under tension from movement or dancing. Fourth, if the costume needs to survive an outdoor event, avoid paper-based construction entirely, since even light moisture will cause paper ears to sag or fall apart within an hour.
A costume piece only works if it survives the event it was made for. Spending an extra ten minutes reinforcing the base of an ear almost always saves an emergency repair later in the night.
Common Mistakes to Avoid When Making DIY Black Cat Ears
Even simple projects can go wrong in predictable ways. Watching for these issues ahead of time saves time and frustration.
- Cutting ear pieces too small, which makes the finished ears look flat or barely visible from a distance rather than reading clearly as cat ears in photos.
- Skipping the curve or fold step, which leaves ears sitting perfectly flat instead of cupped, reducing the realistic three-dimensional look.
- Using too much glue at once, which causes strings and lumps that show through thin felt or fabric.
- Attaching ears too close together or too far apart on the headband, throwing off the natural placement compared to real cat ear positioning.
- Forgetting to test the headband or clip fit before the event, only to discover it slides or pinches once actually worn for an extended period.
Frequently Asked Questions
How long does it take to make DIY black cat ears?
Most felt-based projects take between fifteen and thirty minutes, while structured fabric ears with sewing can take closer to an hour. Paper plate ears are the fastest option, often finished in under ten minutes.
What is the cheapest way to make cat ears?
Upcycled cardboard ears covered in scrap fabric or an old bathrobe cost close to nothing, since the main materials would otherwise be discarded. Felt headband ears are the next cheapest option, typically costing only a few dollars for felt and a plain headband.
Do cat ears need to be sewn, or is glue enough?
Glue is sufficient for most short-term costume needs, especially with a hot glue gun. Sewing becomes worthwhile for structured fabric ears or clip-on ears that need to survive an entire cosplay event without coming apart.
How do I keep cat ears from sliding around on a wig?
Clip-on ears generally perform better than headbands when paired with a wig, since the metal clip grips the wig material directly rather than resting loosely on top of it.
Can these projects be adapted for other ear colors or animal costumes?
Yes. Every technique described here, from felt headbands to structured fabric ears, works the same way regardless of color. Swapping black felt for another color, or adjusting the triangle shape slightly, adapts these same six methods to foxes, rabbits, or other animal costumes.
Conclusion
Building a convincing cat costume does not require professional sewing skills or an expensive craft budget. The 6 DIY Black Cat Ears Projects for Your Next Costume or Cosplay outlined above cover every practical scenario, from a ten-minute paper plate craft for a child’s school event to a fully structured, sewn ear designed to survive a long day at a cosplay convention.
The best next step is simple: match the project to the timeline and the event. For a same-day costume need, the felt headband method in project two delivers a clean result fast. For a cosplay look that needs to photograph well and last for hours, the structured fabric ears in project three or the clip-on satin ears in project five are worth the extra time. And for anyone looking to save money while reducing waste, the upcycled cardboard method in project six turns household scraps into a sturdy, ready-to-wear accessory. Whichever method gets chosen, testing the attachment before the event and reinforcing the base with a little extra glue or stitching will make the finished ears far more reliable when it matters most.